
Tynker’s new Synthesizer blocks make creating your own sound effects and instruments fun and easy.
You can create funky basslines, crunchy dubstep drops, glitchy chiptunes, or a groovy ‘70s organ solo—in short, sounds, noises, and instruments from any style of music you can imagine! You can even create bleeps and bloops from retro games like Pong, Super Mario, and Donkey Kong.
These synth blocks are seriously cool. Let’s dive in!
BTW. 🎧 We’re gonna make some noise! Make sure you’re wearing headphones or earbuds for this tutorial. Seriously. 🙂 Find the volume controls on your device, too.
Press Play ▶ to hear a synth demo:
The Synth tool is a Tynker Extension, which means you’ll need to enable it. You have two options:
Option #1: Search for a synth command, like create synth, then use it in your project. The Synth extension will be automatically enabled.
Option #2: You can also click More at the bottom of the coding palette, then choose Synth and Add.
Table of Contents
Synthesizer Basics
The power of the synthesizer tool is creating your own custom sound effect— it’s like you’re inventing an instrument! To create one, use the create synth block.
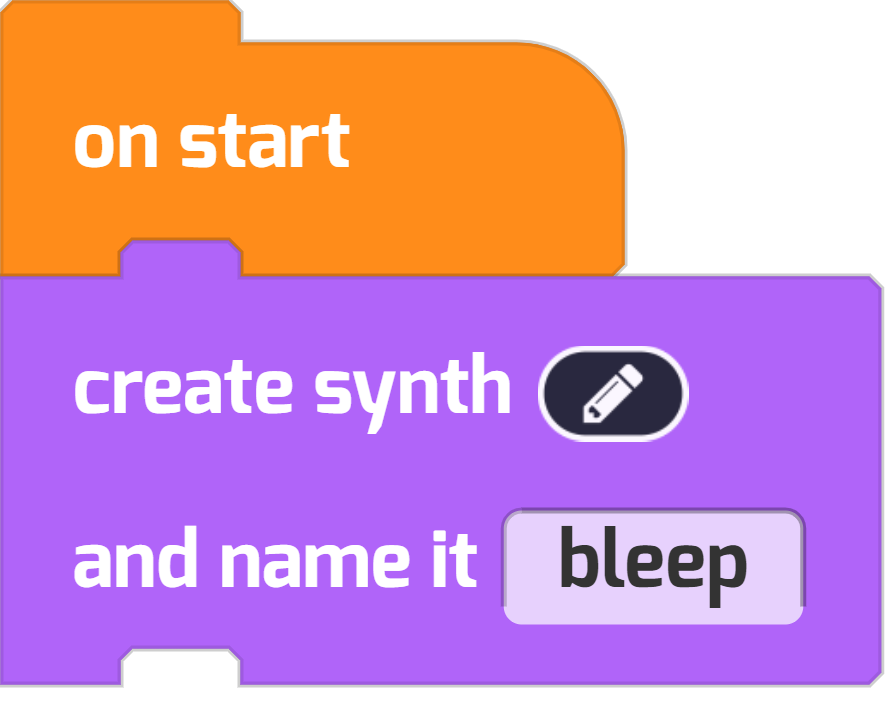
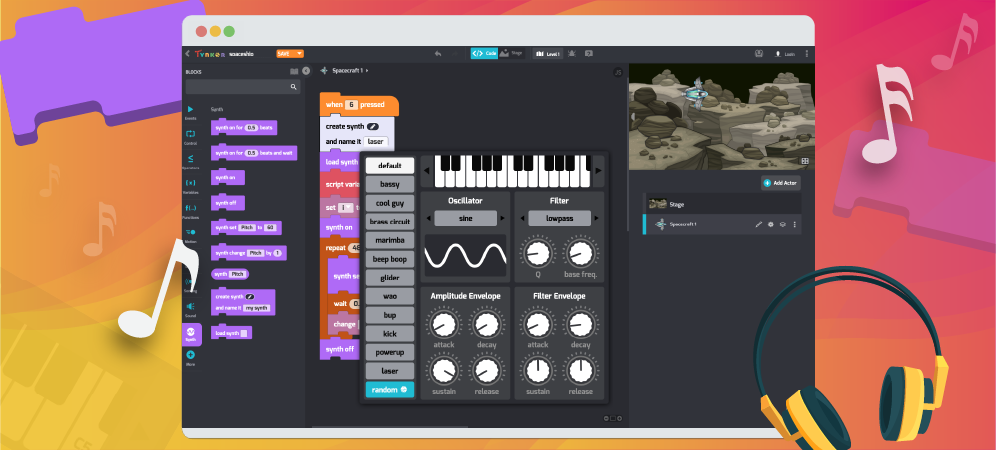
Give your synth a name, like “bleep” or “my sound.” If you click the pen icon 🖊, you’ll open up the synth editor pane, which allows you to fine-tune your effect. Let’s take a look:

❶ Pre-built Effects — Choose one of these to set a starting point for your synth. Click random to get a random effect.
❷ Preview Your Note — Press a key on the keyboard to see how your synth sounds. You can reach higher or lower octaves by clicking on the ◀ ▶ controls.
❸ Oscillator — Change the starting waveform to get a totally different sound ◀ ▶.
❹ Filter — Change the filter effects to process the waveform ◀ ▶.
❺ Envelope Controls — Play with the amplitude and filter envelopes by changing the Attack, Decay, Sustain, and Release.
When you click away from this preview, your synth settings are saved. Click on the pen 🖊 to edit it again.
Hey, What’s Up with All those Knobs?!
Wondering about Attack, Decay, Sustain, and Release, and… what they mean? In short, they’re dynamic controls that allow you to take total control of your synth.
Here are their locations on an example waveform.

Attack describes how quickly your sound reaches peak loudness. Staccato sounds like drums or guitar plucks have short attacks, while bowed instruments that “swell” have a long attack.
Decay describes how quickly your sound’s volume drops after the attack. Staccato sounds also have a short decay.
Sustain describes how loud your sound will be played after the decay. Unlike the other parameters, sustain isn’t measured in time, but instead a percentage of the maximum volume.
Finally, Release describes how fast the note stops playing entirely, after the user lets go of the key.
The best way to understand the synth options is trial-and-error—so play around with it! Try out these effects, then preview your notes. Explore the preset synths. Keep experimenting until you’re happy. Next, you’ll learn how to control your new synth using code.
Play Synths with Code
You have some options for playing your new instrument. First, you can make your effect play using the synth on and synth off blocks. For example, this code continuously plays your synth for 4 seconds:
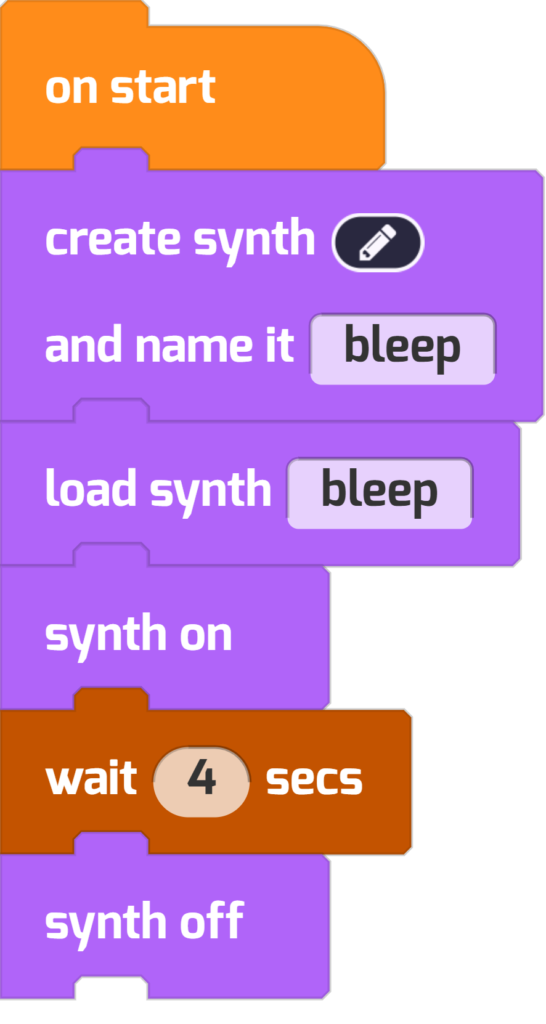
DEBUGGING TIP: Notice how this script 1) creates a synth, then 2) loads the synth you want to play, then 3) uses another block to play synths. If you don’t hear your sound play, it’s likely you’ve forgotten a step in this process.
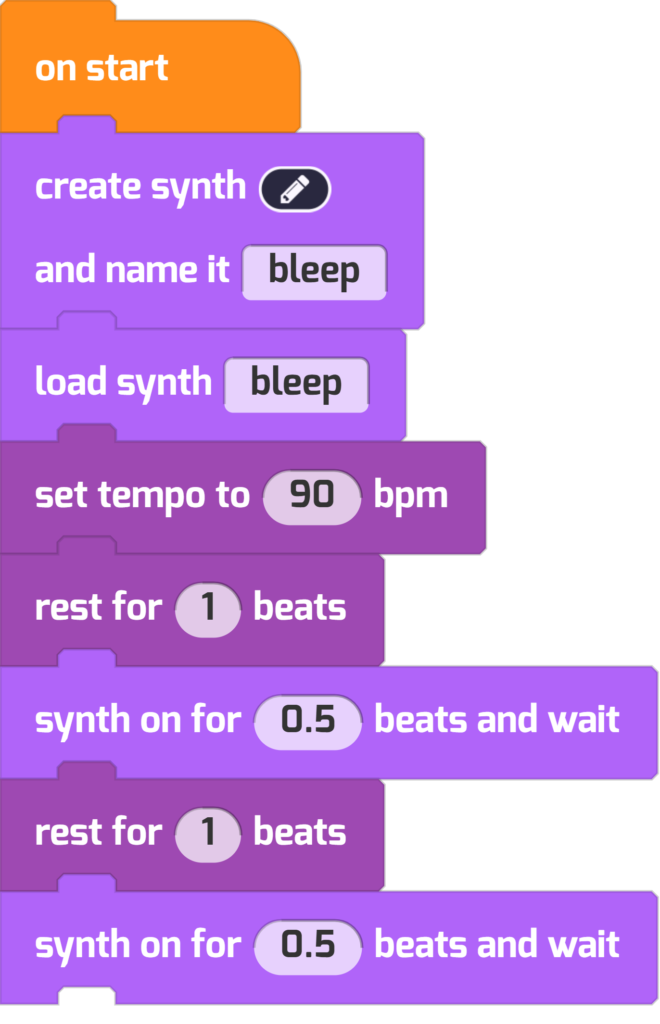
You can also control your synth using beats instead of just turning the synth on and off. Here’s code that sets a tempo, using the controls that are available in the Sounds category:
A Random Synth
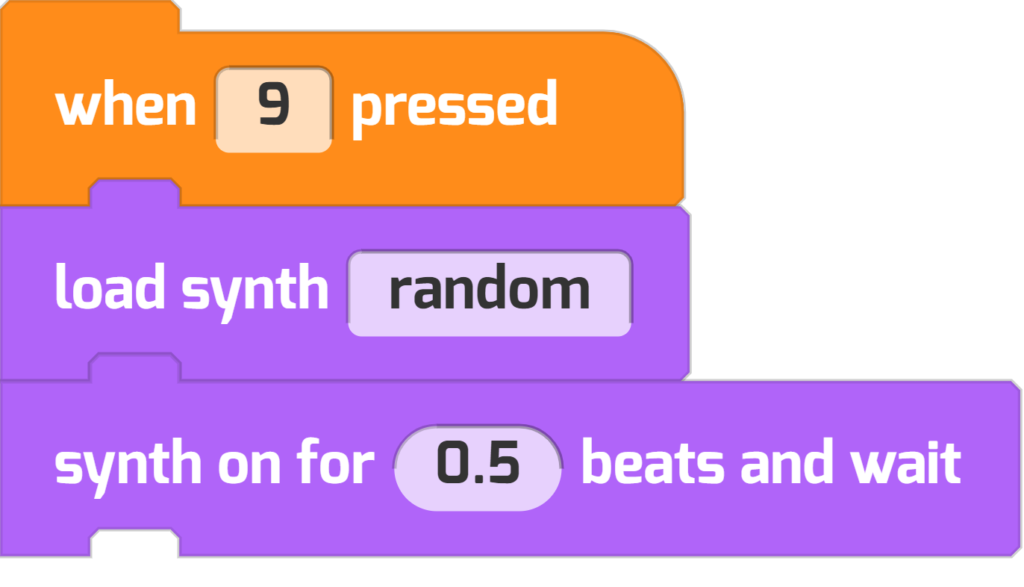
Don’t care what your effect sounds like? Or want it to be unpredictable?! You can also use the load synth random block to get a new synth noise, at random, each time the block runs. Notice how you didn’t have to create a synth.
Choose a Note: Pitch or Frequency
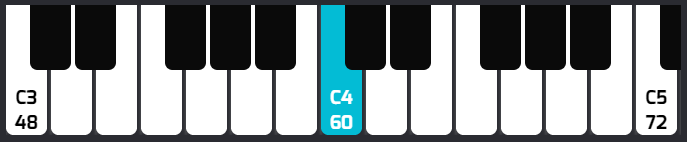
You can also control the pitch of your synth using musical notes or frequency. Pitches are numbered and refer to musical notes you’re probably already familiar with.
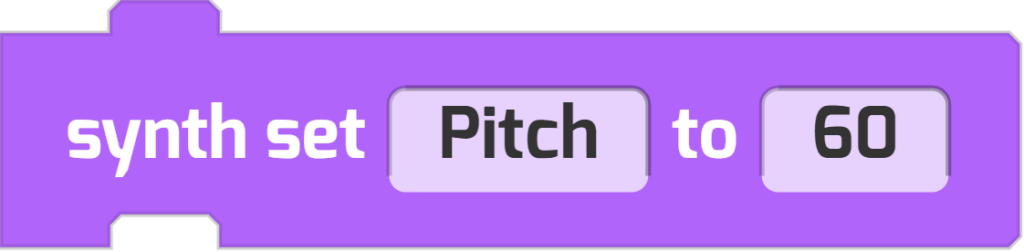
For example, this code plays a middle C, note 60, which can also be written as C4.
In contrast, frequency is measured in hertz (Hz), and it isn’t constrained by a musical scale. This allows you to make some weird sounds! The human ear can hear in the range of 20 Hz to 20,000 Hz.
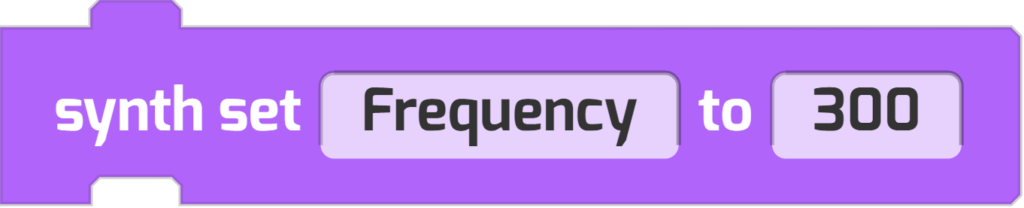
The synth set pitch and synth set frequency blocks are two ways of controlling the same thing. Let’s play with a few more examples to get the hang of things and see the possibilities!
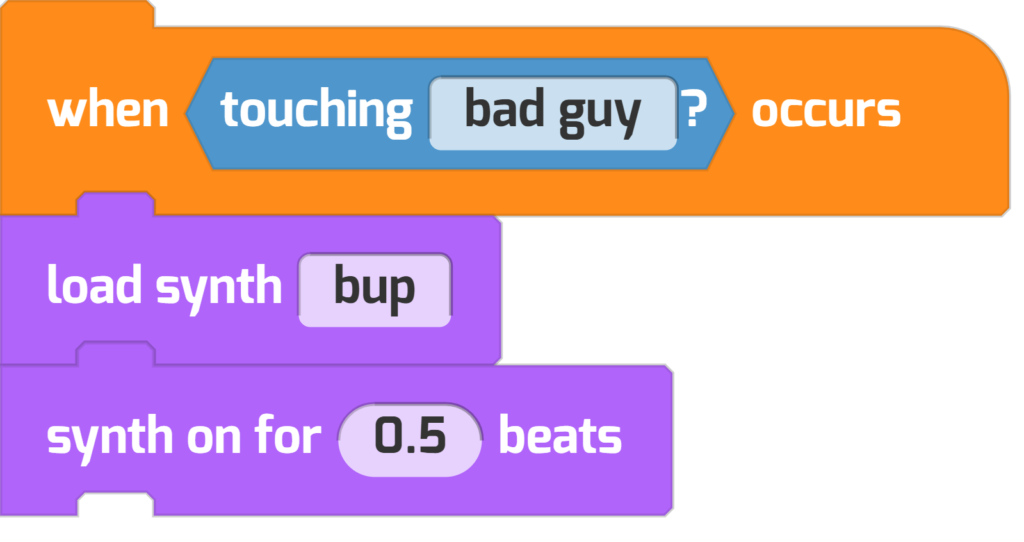
Project #1: Punch Synth Effect
Here’s an effect that sounds a little bit like some kind of impact. You could use it when your hero bumps into a bad guy. It uses the synth preset called bup.

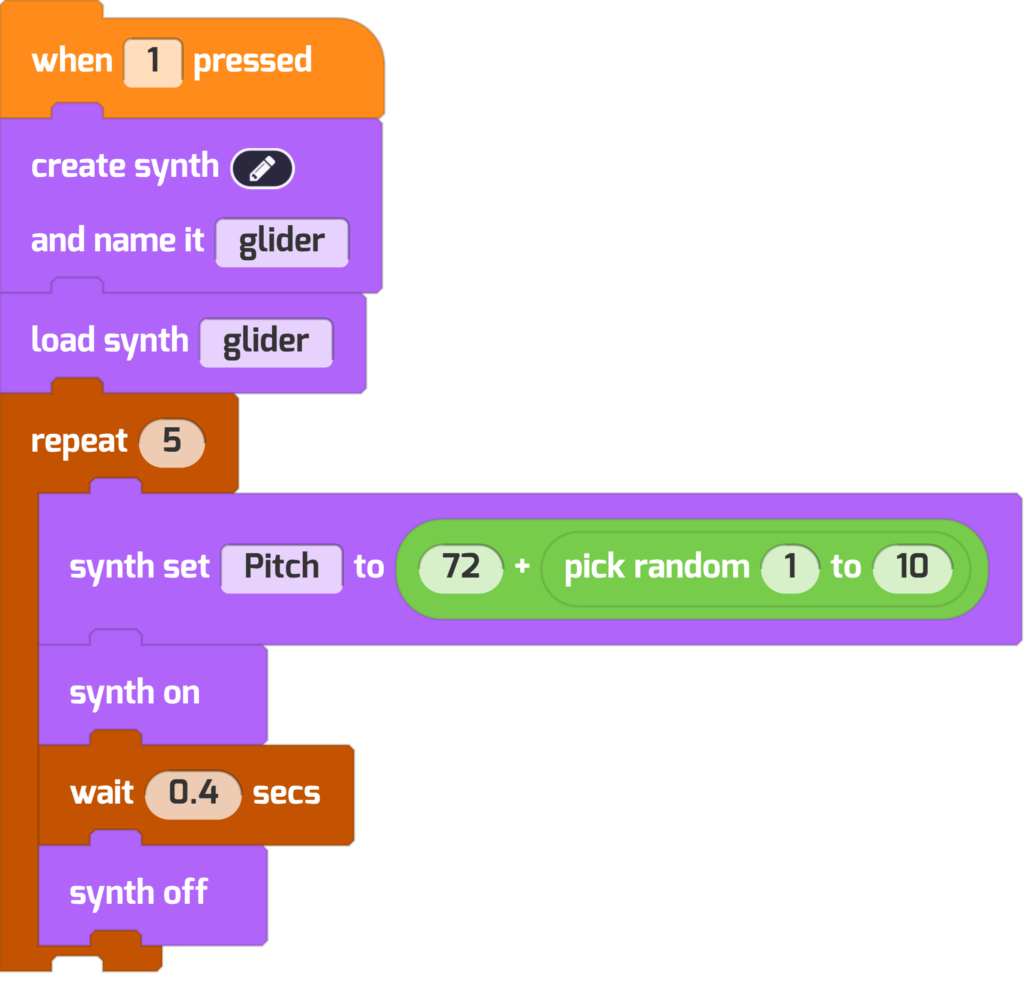
Project #2: Eerie Flute on the Alien Planet
This synth uses the synth preset called glider. It will choose a random pitch from 73 to 83 to play in a sequence, five times, creating an unpredictable and otherworldly noise.
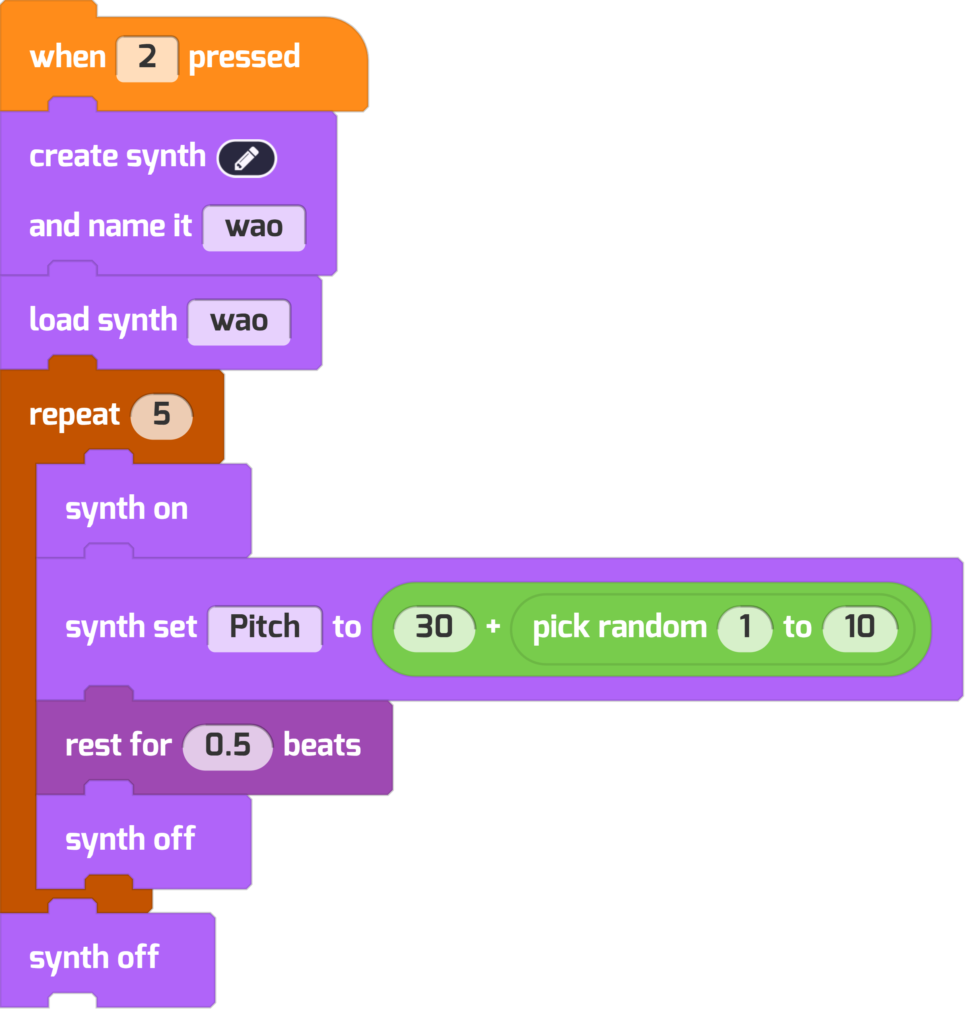
Project #3: Dubstep Crunch
Drop the beat! This crunchy dubstep effect uses the wao preset synth.
Just like the last code snippet, it picks a random series of notes to play in sequence. This starts much lower and will play notes with a pitch of 31-41, giving us the bass we want!
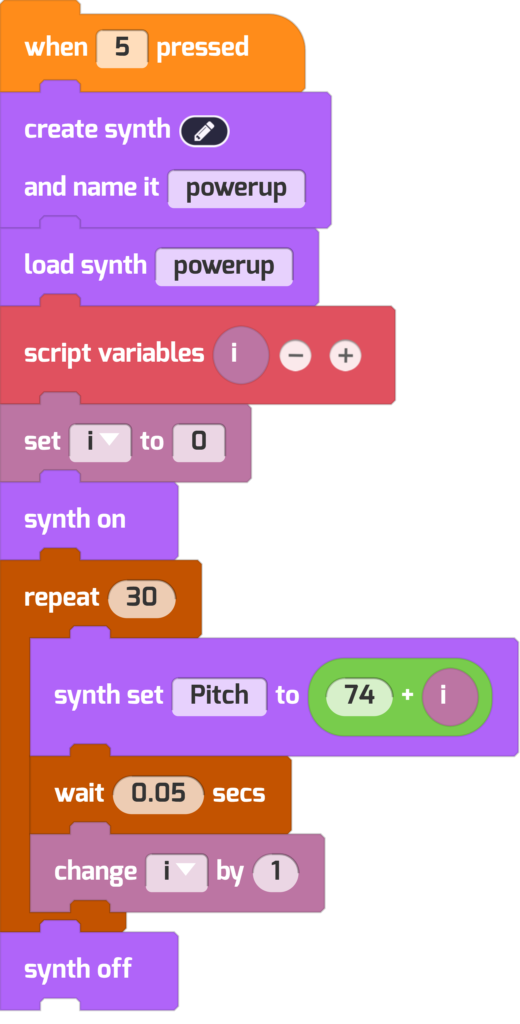
Project #4: Rising Glissando Synth
A glissando is when you play a scale. On a real-life piano, you’d be gliding your hand up or down, hitting each key as you go. This would be a nice sound effect for a powerup!
Notice how this project uses a script variable called i to increase the pitch with each repeat loop.
Project #5: Falling Frequency Synth
You can also change notes using the set synth frequency block. Maybe you have a game with dangerous pits, a scene where an alien ship lands, or something other kind of falling. Here’s the code that makes it happen:

Compare this script’s sound versus the set synth pitch block. Experiment with both!
Project #6: Racing Heartbeat Synth
This repeating blip starts slow and steady, and gradually ramps up in speed until the tension is unbearable! Use this effect for a level that gets more difficult over time—or as a “heartbeat” sensor for enemies that are closing in on your position!
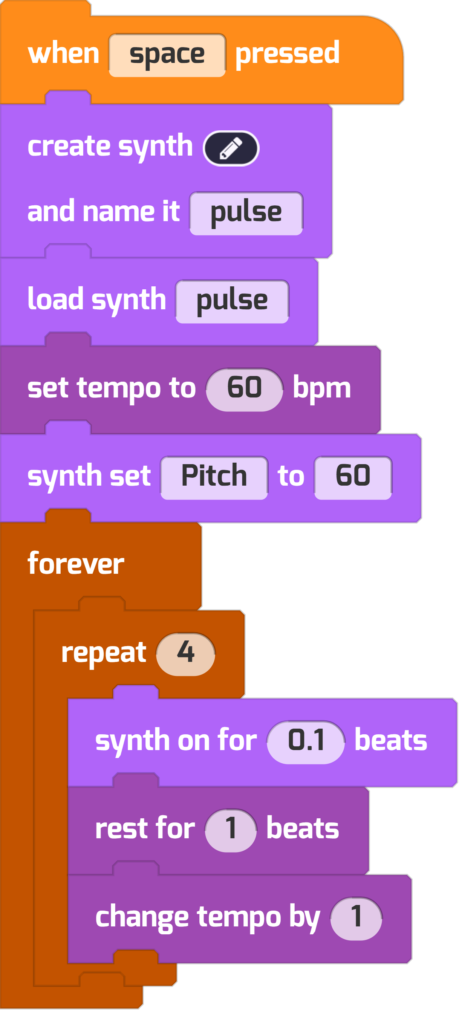
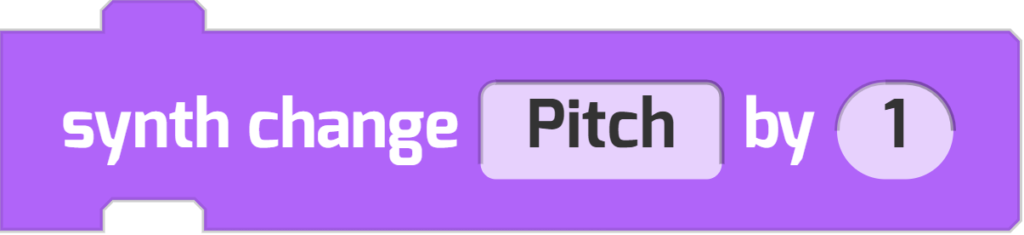
Want to make it even scarier? Raise the synth’s pitch as it speeds up, too! Using this synth control, increase the pitch after each repeat 4 loop:
On Your Own
Sound effects can really improve your stories, games, and animations! This tool is brand new, so it’s up to you what to create. Here are a few ideas:
- Add a synth sound effect to your favorite Tynker project.
- Listen closely to a movie, game, or song that you love. Think about a sound effect or instrument you want to try to create in Tynker, then try it out!
- Create a custom soundboard. Can you control how your synths play by creating on-stage buttons?
- Check out the Sound Blocks, too, while you’re at it. Can you write an original song that uses your synth?
Make something cool? Share it with us at community@tynker.com!
More Activities
Looking for more activities? Check out our Course Catalog.
And read the rest of our free tutorials in the Tynker Toolbox series:
- Tynker Workshop Basics — Learn about coordinates and start coding with Tynker.
- The Animation Tool — Learn about frame-based animation and other animation tips.
- The Character Creator — Take control of custom rigs using the Animation blocks.
- Text Tricks — Work with speech bubbles and more. Tell your own stories, put on a play, or make a computer write poetry!
- The Sound Blocks — Play music with code! Add custom sound effects, too. Tynker’s brand new music tool supports MIDI and MP3.
- Code Block Tricks — Get top-secret ninja tips for writing code fast in Tynker Workshop.
- The Pen Blocks — Make your actors draw as they move. Create patterns, draw geometric shapes, and more.
- The Physics Blocks — Create games or simulations with gravity, collisions, and more. Think: Angry Birds and Marble Madness.
- The Augmented Reality (AR) Blocks — Want to use video or photos in your programs? Try the AR Blocks, which let you code your own selfie!
- The Artificial Intelligence (AI) Blocks — Take your AR projects to the next level with face-, hand-, and pose-tracking. Explore what makes AI special.
- The Debugger — Learn about Tynker’s data debugger and get bug-fixing tips.
- The Tutorial Builder — Did you ever make a really cool Tynker Block project and wish you could teach the whole world exactly how you did it? Now you can!
- The Python Editor — Looking for a challenge? Ready for your next step on your coding journey? Learn Python with Tynker too, and take the plunge into text-based coding.
*At the moment, these new synth block features are only available on the web at Tynker.com.
