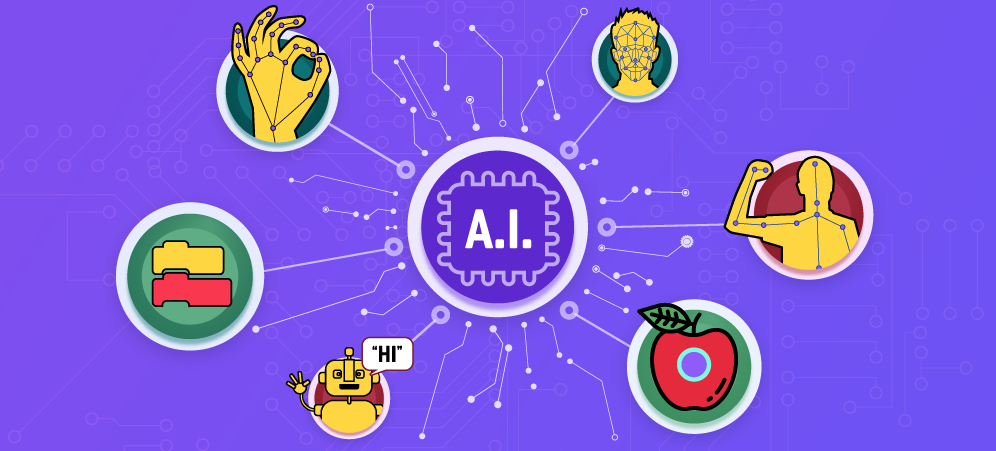
Have you seen Tynker’s brand-new AI blocks? They allow you to create all kinds of unique gameplay. Take a look some of of these webcam-powered AI projects for some ideas:
Make games that get you moving!
Control arcade games with your hands!
Create interactive artwork programs!
Let’s explore how to do it. You can find an existing Tynker project you’ve made you’d like to add AI to, or you can follow along in a blank project (Login at Tynker > Projects > Create Project > Create Blank Project).
Table of Contents
Choose Your Tracking Style
Tynker’s AI blocks offer three different kinds of Pose Detection styles for your webcam:
Face Tracking — This mode is useful for virtual costumes or Snapchat-style effects — of course you can create games with face-tracking too!
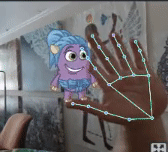
Hand Tracking — When you want to track the user’s hands, and especially the fingers themselves, use this mode. Hand tracking lets you create digital puppets or games that require precision. Hand tracking also allows for “gestures” that control your Tynker project.
Body Tracking — This style allows you to track ALL parts of your body, including hands, face, shoulders, and even your legs. Think: Tracking for exercise games and other “full body” projects.
Not sure which style to pick? Read on for some practical scripts and ideas for how to add them to your game. Notice these three icons on Pose Detection code blocks — they indicate the tracking style used by the block.

Activate Your Webcam
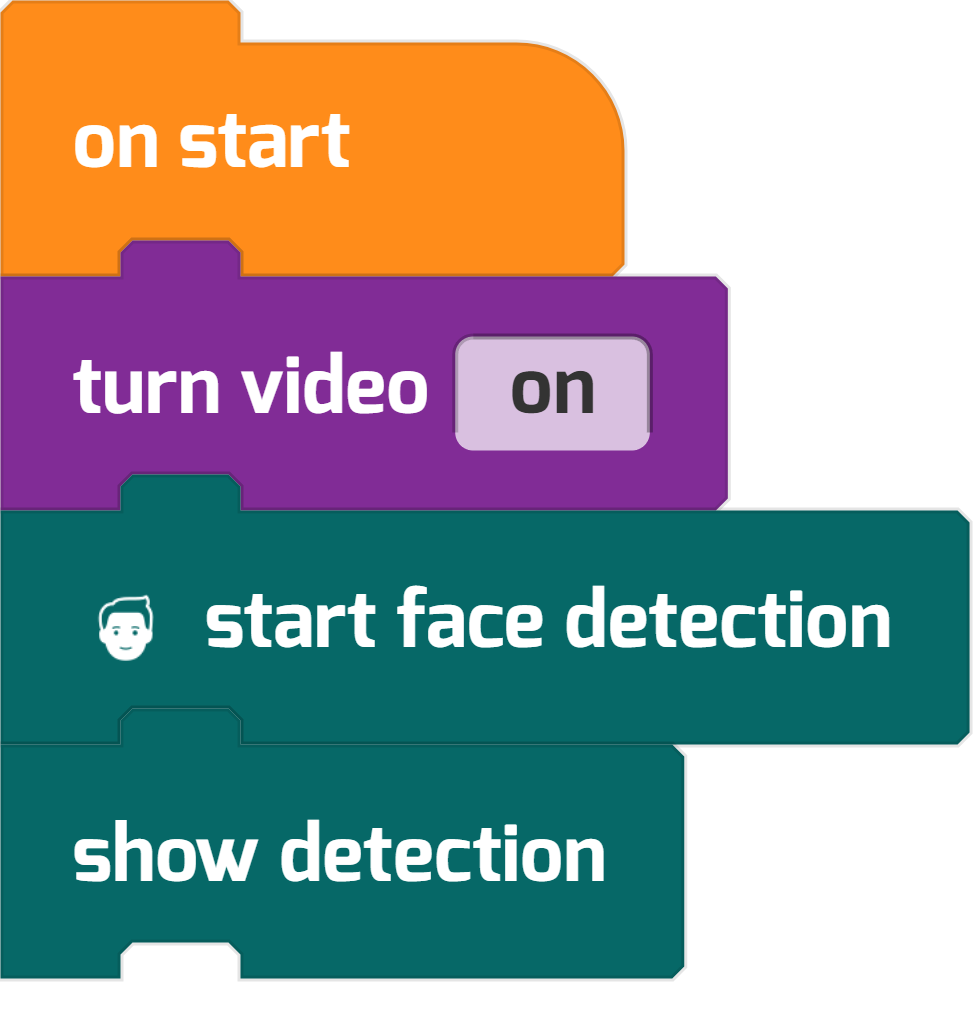
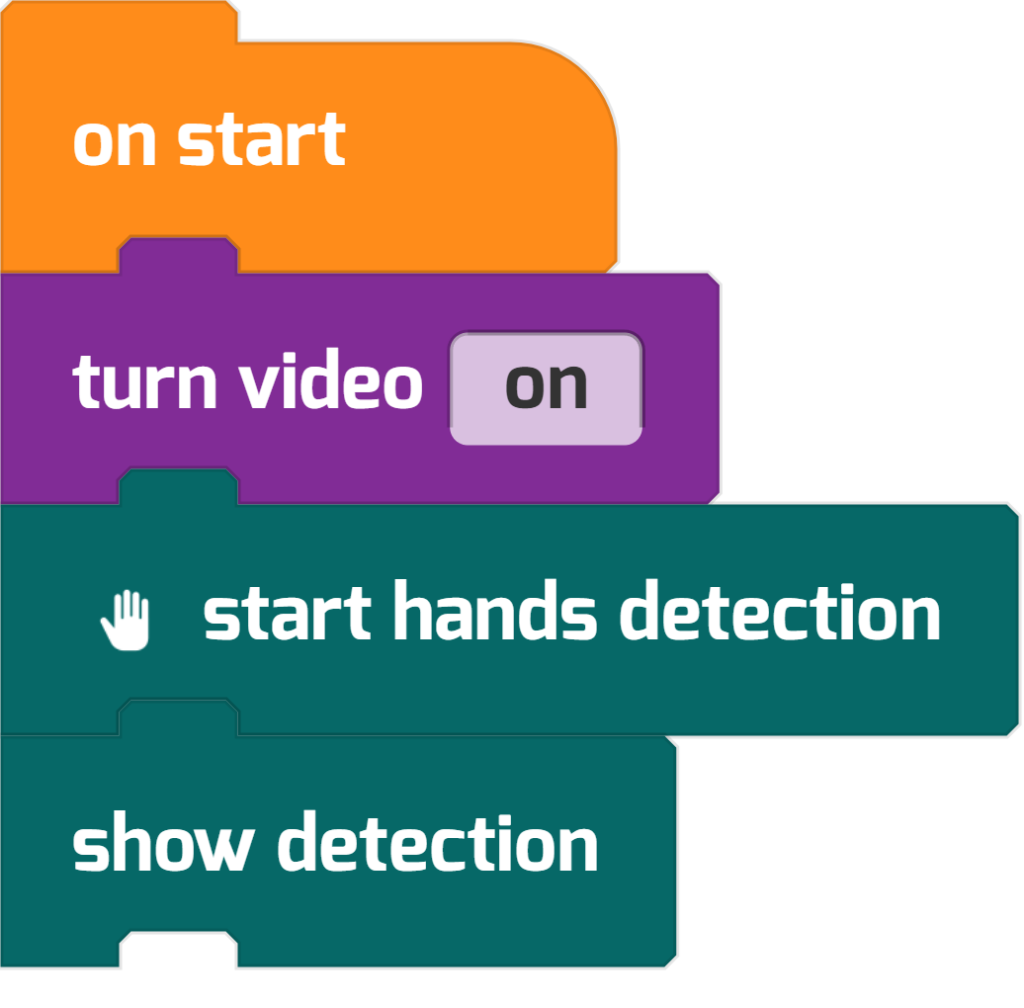
No matter which style of Pose Detection you use, to start, you’ll want to turn on your webcam, enable the specific tracking you’d like, then as an added step, show the detection, which will provide a “skeleton view” of what the AI is seeing. (As soon as you use these blocks, AI will be enabled for your Tynker project. You can also enable AI directly by clicking MORE at the bottom of the coding palette, then selecting AI & ML > Pose Detection.)
Here is a short script to begin face-tracking:
Here is a short script to begin hand-tracking:
Here is a short script to begin body-tracking:
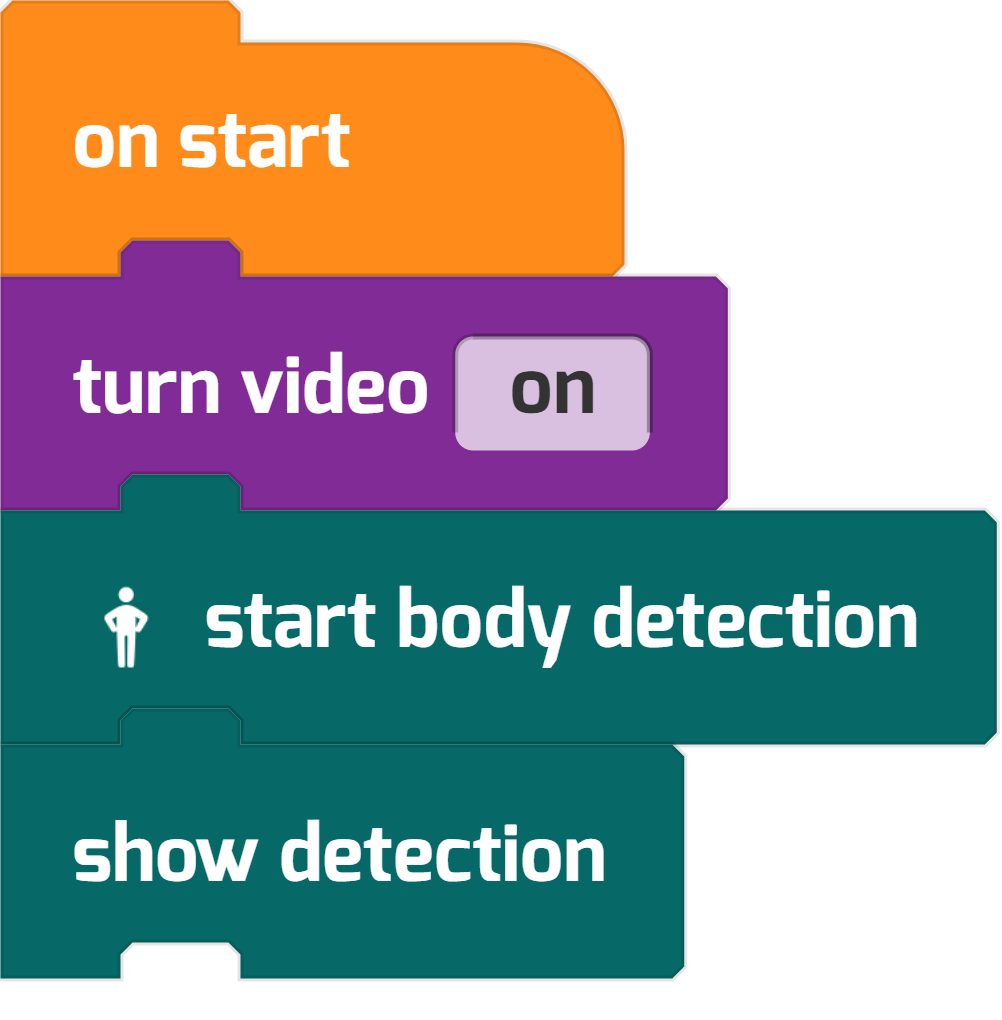
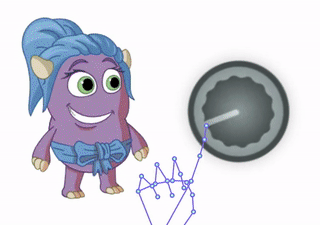
Notice how all of these will turn your webcam’s video on, start a particular kind of detection, then use the show detection block, which provides a visual hint at “what the AI sees.” For example, you might see something like this while using Hand Detection, showing where the AI tracks the right hand:
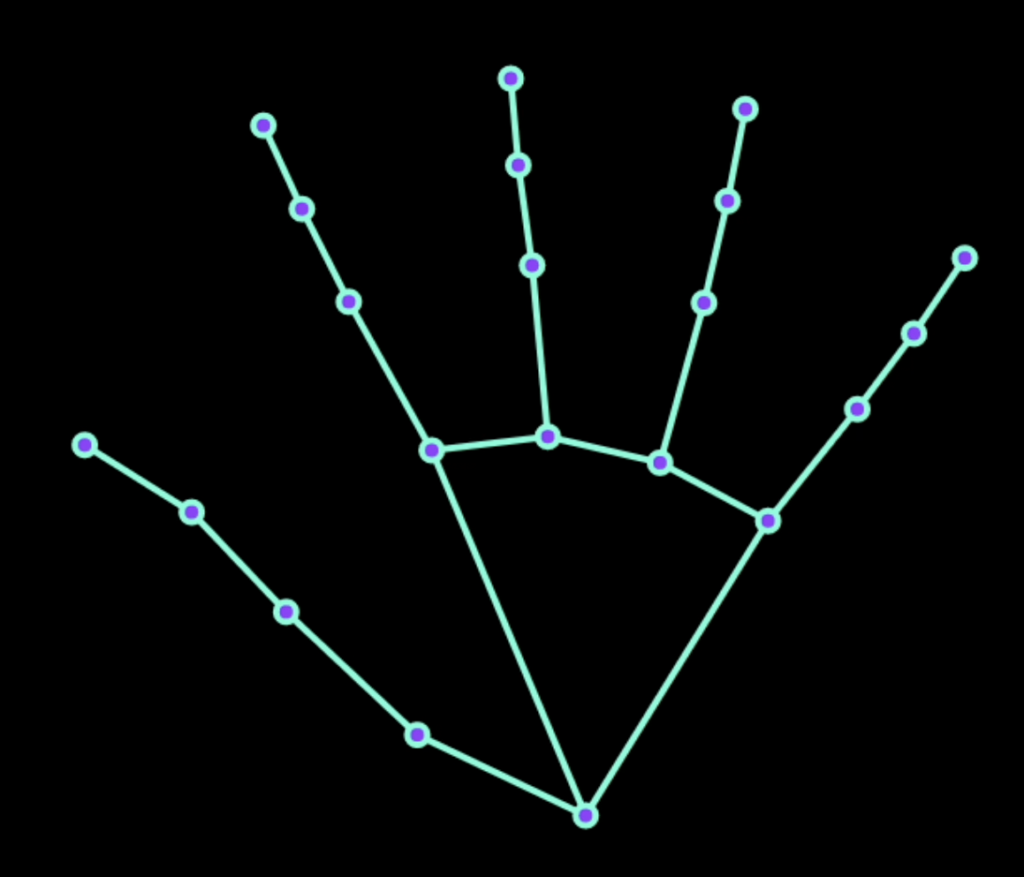
Showing detection will help you debug your webcam-powered games, and it also provide a hint to the user when they need to reposition their camera for the best possible view (for example, to keep their hands within the camera frame).
Tip: You only need one of these starter scripts — choose either Face, Hand, or Body Tracking modes while using Pose Detection. If you’d like, you can adjust your video’s transparency, too.

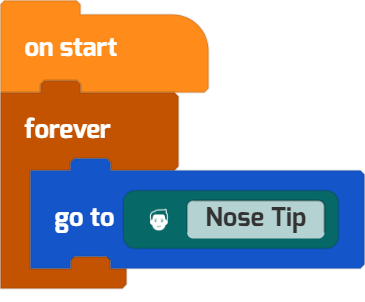
Digital Costume — Clown Nose
Here’s a simple script that makes a Red Ball actor follow your nose using Face Tracking. Move your head around and your new nose follows!
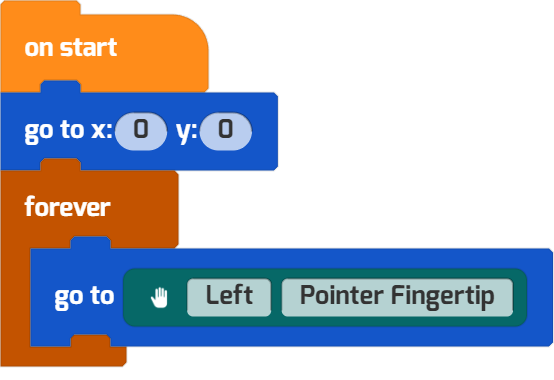
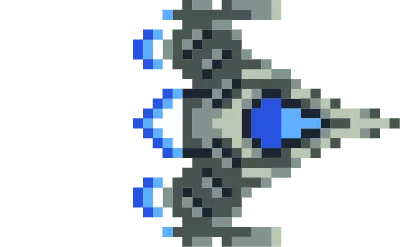
Go to Fingertip — Fly a Spaceship
You can use the same trick with the Hand Tracking blocks too. Here’s a spaceship that follows your finger.
Point to Aim — Fixed Position Aiming
You can use AI landmarks as “targets” for the point towards blocks too!
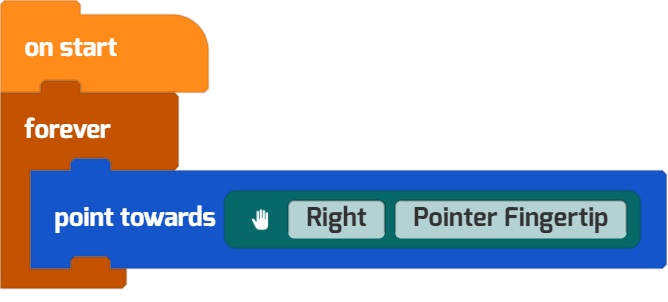
You could use this style of control in a game with a “pivot to shoot” mechanic like this one:
Pinch to Shoot — Gesture Basics
You can use landmarks plus a little bit of mathematics to create custom gestures. This script will trigger whenever the player’s two fingers are closer together than 50 pixels. This idea is used in the demo shown above to shoot the cannon.
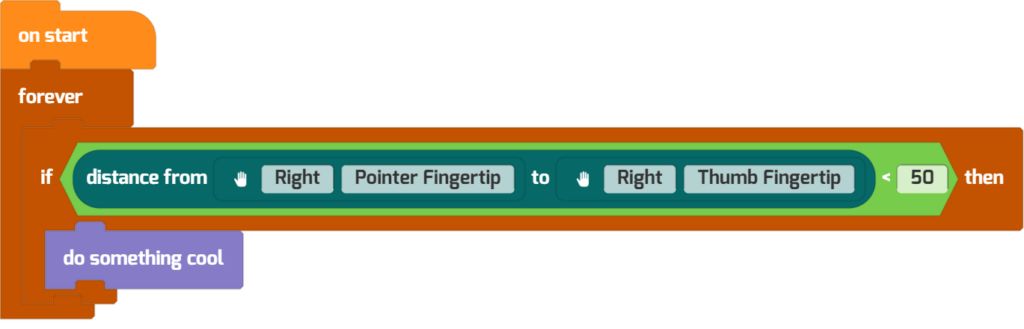
This allows a “pinch to trigger” effect in the game! Need more input controls? Use a bunch of different finger landmarks. For example, you might have four different “moves” in your game triggered by touching the pointer, middle, ring, or pinkie finger to your thumb, just like you might have four buttons in an arcade game. Try it out!
Pinch to Scale — Interactive Art
Here’s another trick. You can set the size of an actor relative to the distance between two landmarks.
The actors goes to the x and y positions of the right thumb tip. But then, the actor is set to a size equal to the distance between the pointer fingertip and the thumb’s tip:
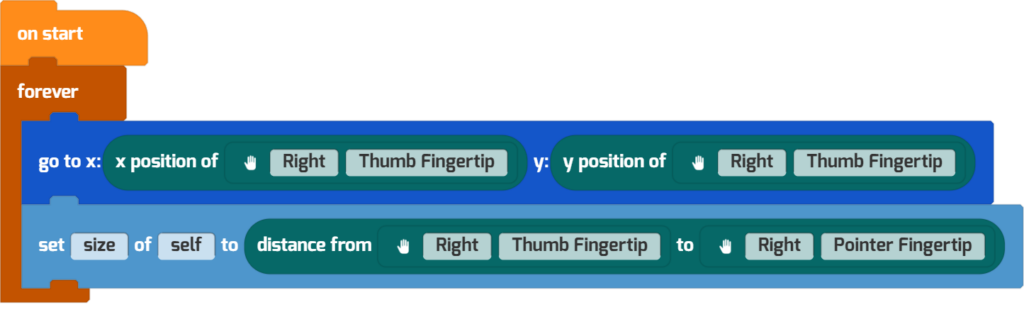
Experiment with actor sizing and use math operators (like +, -, *, and /) to tweak your character’s size.
Jog Wheel — Spin It!
Here’s a simple virtual knob or “jog wheel.” The player can spin the wheel with their fingertip to change a value!
Here’s the code for the Jog Wheel actor:
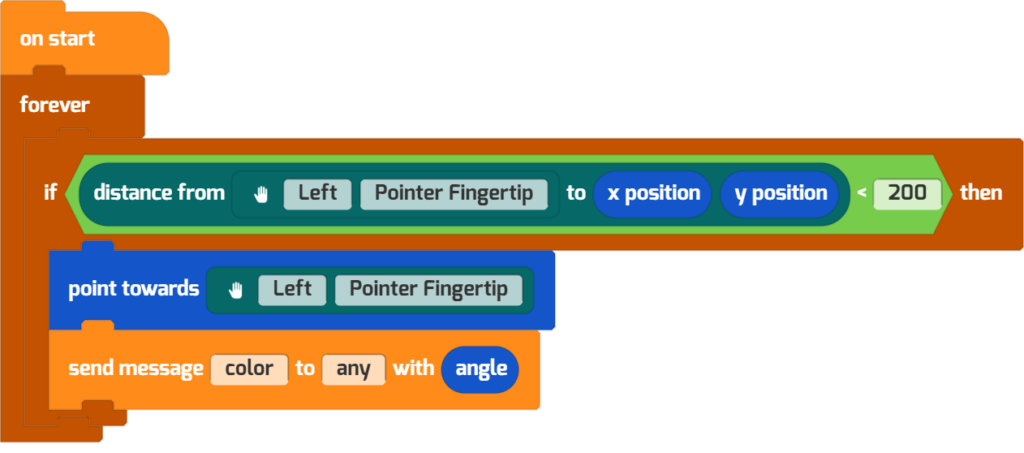
Read the code carefully to see how it works: If the left finger’s pointer finger gets close enough, the Jog Wheel points towards that fingertip landmark and a message is sent, including the current angle value. This value can then be retrieved and used in a script like this one, using the received value block.
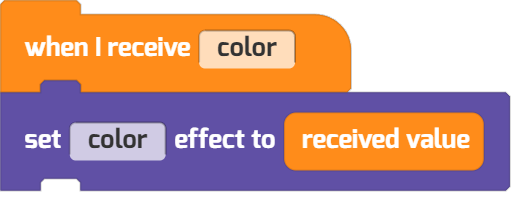
You can try it out with color effects or other properties to create an interactive project of your own imagining!
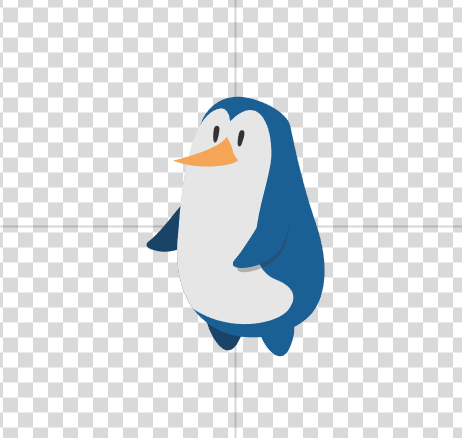
Tip: Adjust an Actor’s Center Point
When you’re making your own AI costumes or actors, you will want to pay special attention to their size and center point. In Tynker’s Drawing Tool, the center of an actor is where these two gray lines meet.
Need to adjust how an actor gets positioned? For small changes, you move the actor using the Selection tool. Or you can use the Center button in the Drawing Tool to pick from a set of predefined alignment options:

Wait a Second…. How’s This AI, Anyway?
These projects are using AI behind the scenes.
The AI models have been trained on a large dataset of images featuring hands, faces, and bodies in various positions and have learned to identify key landmarks. When you interact with the project, the model analyzes the incoming video feed to identify and follow the movements of your hands and features, providing accurate and instantaneous tracking.
This massive amount of “training data” plus AI algorithms enables the interactive features of these projects!
Want to dive deeper? Tynker offers two additional AI block coding features for students and educators wanting to take AI further.
Find Object Recognition blocks to explore Tynker projects that can recognize common household objects (like cellphones, cups, cars, and so forth).
And if you’d like to see how coders can train AIs by hand, using their own creativity and planning skills, use the Natural Language Processing blocks for a coding challenge. Explore these topics and much more in Tynker’s AI Course.

Looking for More? Try Ribbon Dance
Explore AI and interactive art! A colorful ribbon follows your fingertips in this cool step-by-step tutorial. Like all Pose Detection projects, a webcam is required.

Coding Challenge: Add the Pen Blocks
Can you figure out how to reproduce this effect in Tynker code blocks? This effect mimics the classic Finger Trap toy, but the effect is purely virtual!

Hint: The Pen Blocks draw a line from landmark-to-landmark. Explore the Tynker tutorial called Snow Angel for more cool Pen tricks with Tynker’s AI blocks.

Debugging Tips for AI
Here is some advice for when you start coding your own original webcam powered projects:
- I don’t see anything! Make sure you turn the video on, start detection, and show detection. Use a starter script like the one shown here. Use the show detection blocks so you can easily see how the AI is tracking you. You will also need to Allow webcam access when the Tynker website prompts you. A working webcam is required for these projects. You may need to adjust your lighting and camera angle for best results.
- Check your landmarks. All of your landmark code need to use the same style. For example, your code won’t work if you are using Body landmarks while Face detection is active. It’s easy to make a simple mistake (for example, using the Left Hand instead of the Right) so read your code very closely.
- Print values. Wondering how things work, exactly? You can make your actors report the value of a variable or their own properties on stage using say or set label blocks.
- Write code a little bit at a time. Run your code as you add features, rather than writing everything all at once. Start with the smallest possible version of your game, then add to it once the basic mechanics are working.
- Save backups. Save different versions of your code before making big changes, in case you need to revert. Use Save As to save a different version of your Tynker project.
- Backpack and copy-paste. Experiment in a new project, testing a small piece of your code—use Tynker’s Backpack to save code so you don’t have to rewrite your script.
- Comment your code. Are you making a big project but don’t have time to finish coding it in one sitting? Add comments to your code, reminding you of what needs to be done or isn’t working yet.
Don’t forget: You can ask a teacher or another coder for help, too. Get a good night’s sleep and try again tomorrow! The best debugger is a well-rested mind.
Helpful AI Links
Want to take things further? Stay tuned for exciting AI-powered Hour of Code tutorials from Tynker, coming soon. You can also explore the AI courses and tutorials below!
- See All AI Tutorials and Courses: Visit Your Student Dashboard
- Block Coding for Kids: Tynker’s New AI & ML Course
- Free AI Tutorials: Walkthrough of The AI Blocks – AI Block Coding Tutorial
- Advanced AI with JavaScript: Tynker’s Artificial Intelligence Course
- Info for Parents on Block Coding: Introduction to AI & ML
- Info for Parents on JavaScript: Deep Dive into Artificial Intelligence
- AI Courses for Schools: Equip Your School with AI — All K-8 Plans Included
Go further and discover how Tynker’s Curriculum can inspire the next generation to shape the world through the power of code.
More Activities!
Looking for more fun activities? Check out these Tynker Toolbox articles!
- Tynker Workshop Basics — Learn about coordinates and start coding with Tynker.
- The Animation Tool — Learn about frame-based animation and other animation tips.
- The Character Creator — Take control of custom rigs using the Animation blocks.
- Text Tricks — Work with speech bubbles and more. Tell your own stories, put on a play, or make a computer write poetry!
- The Sound Blocks — Play music with code! Add custom sound effects, too. Tynker’s brand new music tool supports MIDI and MP3.
- The Synth Blocks — Create your own sound effects and instruments! You can create crunchy dubstep drops, glitchy chiptunes, or instruments from any style of music you can imagine!
- Code Block Tricks — Get top-secret ninja tips for writing code fast in Tynker Workshop.
- The Pen Blocks — Make your actors draw as they move. Create patterns, draw geometric shapes, and more.
- The Physics Blocks — Create games or simulations with gravity, collisions, and more. Think: Angry Birds and Marble Madness.
- The Augmented Reality (AR) Blocks — Want to use video or photos in your programs? Try the AR Blocks, which let you code your own selfie!
- The Artificial Intelligence (AI) Blocks — Take your AR projects to the next level with face-, hand-, and pose-tracking. Explore what makes AI special.
- The Tutorial Builder — Did you ever make a really cool Tynker Block project and wish you could teach the whole world exactly how you did it? Now you can!
- The Python Editor — Looking for a challenge? Ready for your next step on your coding journey? Learn Python with Tynker too, and take the plunge into text-based coding.


