
Do you love writing stories and drawing characters with Tynker? Well, now you can make your projects even better by creating your own animated artwork.
Animation uses still images called frames to create movement. Here are some frames of a running horse animation:

With enough still images, animators can create the illusion of movement by displaying frames quickly, one-after-another:
Tynker’s Animation Tool makes creating animations fast and easy!
How to Make Your Own Animated Character
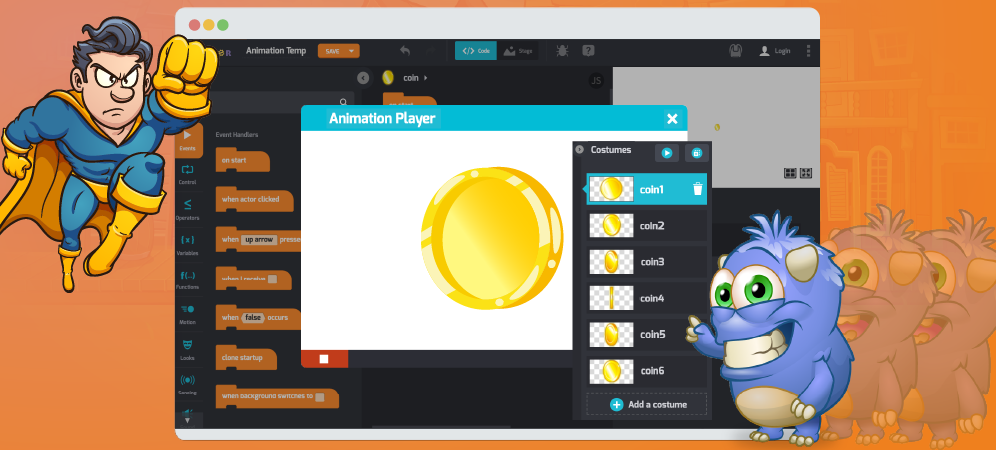
If you’d like to follow along, open Tynker Workshop by visiting Project > +Create Project in your dashboard. Choose Blank Block Coding Project. Now choose Add Actor and create a new one with the Drawing Tool. Or you can open an actor like the Coin (Add Actor > Media Library), which already has a series of costumes that create an animation.
On the right, notice a list of all the costumes for an Actor. This area has a bunch of handy features for previewing and controlling animations. Let’s take a look:
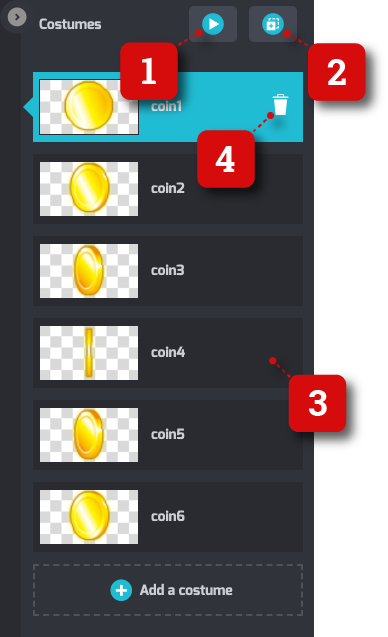
1. Preview Animation ▶️
Plays a video preview of your costumes in sequence.
2. Copy Costume
This creates a duplicate of the current costume. You can edit costumes to quickly create frames of an animation.
3. Click and Drag
Move costumes up-and-down to reorder the sequence of your costumes (frames)
4. Trash 🗑️
Discard a costume (frame).
What Is Two-Frame Animation?
A two-frame animation is like having two pictures that you show one after the other really fast. When you do this, it looks like something is moving or changing. For example, you could have a picture of a smiley face, and then in the next picture, the smiley face winks. When you flip between these two pictures quickly, it seems like the smiley face is winking, even though it’s just two pictures! That’s how two-frame animations work, making things seem like they’re moving or changing with just two pictures.
You don’t need that many costumes to create an animation. In fact, you only need two!


How Do You Make a Custom Animation?
Start by drawing two key frames of your animation: The starting and the ending positions. Try to add frames that are in-between these two positions to create a smooth transition from one frame to the next. Use the Preview Animation button to see how it looks. Keep adding frames until you’re happy with the effect.
Consider the ideas of anticipation, follow-through, and exaggeration.
What Are the Two Types of Frames in Animation?
In animation, there are two important kinds of frames. The first type is called “keyframes.” Keyframes are like important snapshots that show how something should look at specific times in the animation. They help us figure out the main poses and timing.
The second type is “in-between frames” or “tween frames.” These frames come between the keyframes and help make the animation smooth. They fill in the details between the key poses and make things move nicely.
So, keyframes are like the big moments, and in-between frames make everything in between those moments look good in an animation.
Camera Shake
Don’t want to draw? You can make objects appear to shake and shudder.
Create costumes by duplicating the original with the Copy Costume button—then move the costume a little bit in a random direction, each frame, using the Selection tool.

The result is a jittery kind of animation:
Make a cloud move by and enhance the effect!
Digital Tracing Paper: The Onion Skin Tool
Drawing your own animation by hand? You can use the Onion Skin tool to show how nearby frames of animation look. This tool is like digital tracing paper!
Follow along to see how it works. To draw a new actor yourself, go to Add Actor > Drawing Tool.
Then let’s suppose you’ve already drawn a single frame, like this dog, that you’re happy about and ready to start animating.

Let’s add a few frames of animation—so that this dog wags his tail. First, copy the starting costume using the Copy Costume button.

Then switch to your new costume, erase the parts you want to change—for us, that’s the dog’s tail.

Then click the Onion Skin button:

Just like real-life tracing paper, this shows a translucent overlay of nearby frames, so you can so you use it as guidelines for your new frame of animation.

Draw the tail of the dog in a slightly different spot for each successive frame, using the Onion Skin, Copy Costume, and Animation Preview tools, as you work. The result can be smooth motion like this:

Want to learn how to make animations like this? Check out the complete video tutorial to Create Your Own Virtual Pet.
Make a Button Grow and Shrink
You don’t have to use an actor’s costumes to create an animation, either. This script will make a button grow, then shrink in response to getting clicked.

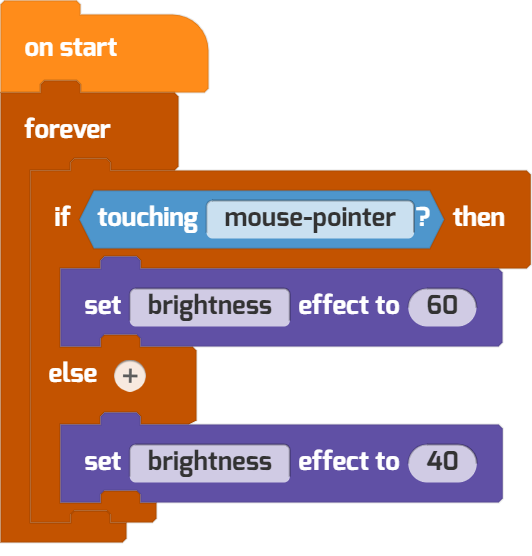
Make a Rollover Animation
Want your users to get a hint that they can click on a button? Use this conditional code, which adds a glowing effect on mouseover:

Hat Tip: Inspired by Scratch Team.
Make It Flash
The show and hide blocks can make simple animations, too. Here’s one that lets the player know that an enemy has been defeated by flashing:
Keep At It!
Here are some other ideas for improving your animations:
- Zoom in and out to get a closer look at your costumes. Use the (+) and (-) buttons in the Drawing Tool or the keyboard shortcuts. You can get close enough to see individual pixels and take fine-grained control of your art:
- Have an animation-style you want to mimic? Try watching the video as slowly as possible, frame-by-frame, to see how the artist achieved the effect
- Look up the “12 Rules of Animation” and practice with them (as described in The Illusion of Life, written by Disney animators Frank Thomas and Ollie Johnston)
- Want to draw realistic hands or people? Take photos and work from a reference
- Practice with pen and paper—but try out a tablet or touchscreen if you get a chance, too
- Look at flipbooks and stop-motion video for ideas of what’s possible with animation
Don’t forget you can import your artwork and photos into Tynker (Add Actor > File Upload).
Want to use this tutorial in your class? Go ahead. And if you make a cool animation that you’d like to share with the Tynker community, email us at community@tynker.com and we’ll post it in our next round of Tynker Toolbox.
More Activities!
Looking for more coding activities? Check out our Course Catalog.
And read the rest of our free tutorials in the Tynker Toolbox series:
- Tynker Workshop Basics — Learn about coordinates and start coding with Tynker.
- The Drawing Tool (Vector Editor) — Draw your own custom animations and artwork!
- The Character Creator — Take control of custom rigs using the Animation blocks.
- Text Tricks — Work with speech bubbles and more. Tell your own stories, put on a play, or make a computer write poetry!
- The Sound Blocks — Play music with code! Add custom sound effects, too. Tynker’s brand new music tool supports MIDI and MP3.
- The Synth Blocks — Create your own sound effects and instruments! You can create crunchy dubstep drops, glitchy chiptunes, or instruments from any style of music you can imagine!
- Code Block Tricks — Get top-secret ninja tips for writing code fast in Tynker Workshop.
- The Pen Blocks — Make your actors draw as they move. Create patterns, draw geometric shapes, and more.
- The Physics Blocks — Create games or simulations with gravity, collisions, and more. Think: Angry Birds and Marble Madness.
- The Augmented Reality (AR) Blocks — Want to use video or photos in your programs? Try the AR Blocks, which let you code your own selfie!
- The Artificial Intelligence (AI) Blocks — Take your AR projects to the next level with face-, hand-, and pose-tracking. Explore what makes AI special.
- The Debugger — Learn about Tynker’s data debugger and get bug-fixing tips.
- The Tutorial Builder — Did you ever make a really cool Tynker Block project and wish you could teach the whole world exactly how you did it? Now you can!
- The Python Editor — Looking for a challenge? Ready for your next step on your coding journey? Learn Python with Tynker too, and take the plunge into text-based coding.
Check out Tynker’s Curriculum and learn more about inspiring the next generation to change the world through code.
