

Let’s get comfortable with the absolute basics of Tynker. In this coding for beginners tutorial, you’ll learn how to move Actors on the Stage using code blocks.
After logging in at tynker.com, you’ll see your Dashboard. First click Projects, then +Create a New Project. You’ll see links to all sorts of exciting computer programming basics templates: From here you can create a Minecraft Mod, code a Music project, or write a Python script using free coding tutorials. But let’s start by making a new block coding project. Click Blank Block Project to follow along.
Now the Tynker Workshop will appear. You’ll see a little blue monster and some code on the screen, something like this:
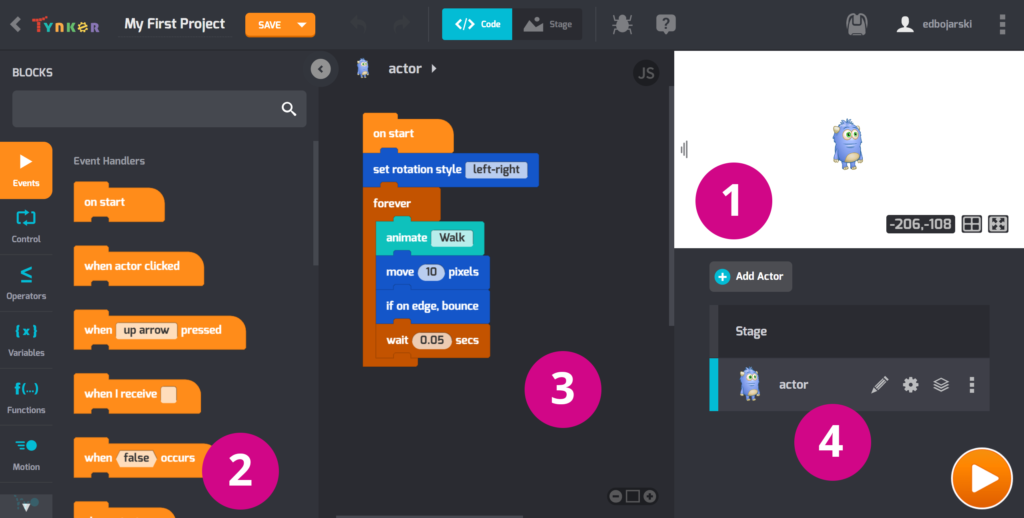
Let’s look at some important sections of the Tynker Workshop:
❶ This is the Stage. You can see Codey, the blue monster, on the Stage for now. Whatever you program, the Stage is where the action happens. You can position Actors on the Stage by clicking and dragging them. And you can start and stop the action using the Play ▶️ and Stop 🛑 buttons.
❷ This is the Code Palette. Blocks are grouped together according to what they do (for example, Sound, Motion, Logic, and so on). To find the block you need fast, you can Search using 🔍.
❸ This is the Coding Area, where you drag and drop code blocks from the Palette for your Actors. Connect a stack of code blocks together to write your own programs.
❹ This is the Actors List. In Tynker, every object and character is an Actor. From the Actor List, you can click Add Actor to add new characters and props. To switch between Actors and add new costumes or sound effects to Actors, just click their names in the Actors List.
Table of Contents
Understanding the Stage and Coordinates
On the Tynker Stage, Actors are placed according to a coordinate grid, like the one you’ve seen in math class. The center is at 0,0. To see the coordinate grid, click this icon.

You’ll see a grid appear on the stage:
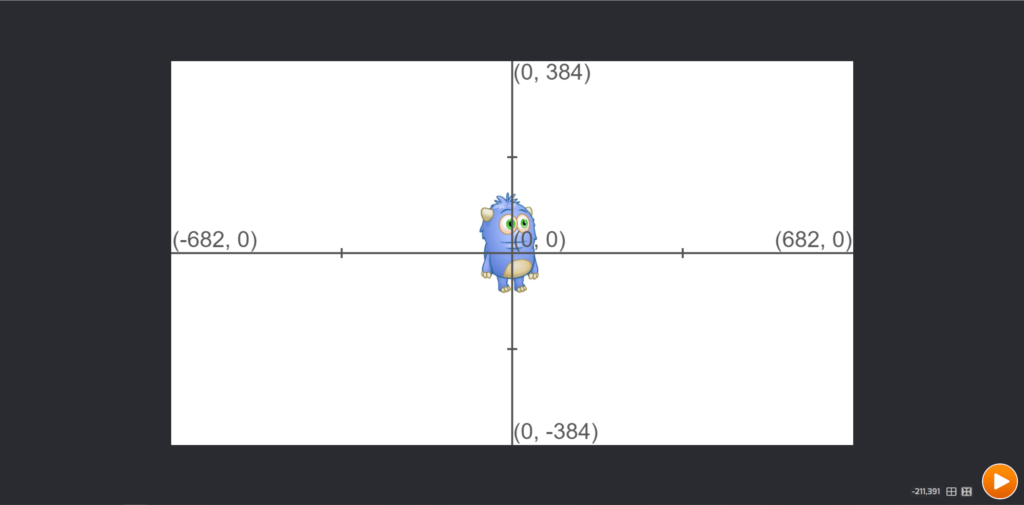
The x coordinates describe an actor’s horizontal position. They go from x = -682 on the left to x = 682 on the right.
The y coordinates describe an actor’s vertical position. They go from y = 384 at the top to y = – 384 at the bottom of the Stage.
You can click and drag an actor to the exact position you want. Notice the current coordinates of the mouse in the lower right.
Your First Program
To explore how actors move on the coordinate grid, let’s try adding new actors and programs. Click the Add Actor button and choose Media Library.
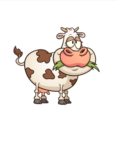
Find an actor that looks fun to you, then click on it. I picked the Cow, but you can choose whatever you like.
Hint: Don’t like your pick? Or want to delete Codey, the blue monster? Click on the ⋮ next to the Actor and then choose Delete.

Hint: If your actor already has code blocks, remove them. To delete code blocks, click and drag them back into the Coding Palette on the left.
Now let’s give your new actor a program. First, let’s drag out the When actor clicked block into the Coding Area.

Then click the Motion group and drag out the move 10 pixels block. Connect it to the When actor clicked block so your code looks like this:
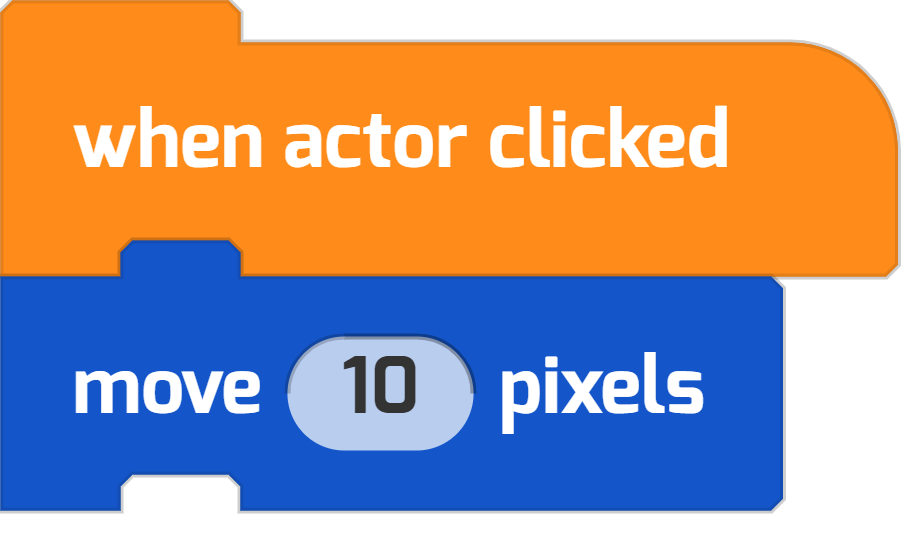
Press Play to test this program! Click on your actor with your mouse and watch them move! Press Stop when you’re finished.
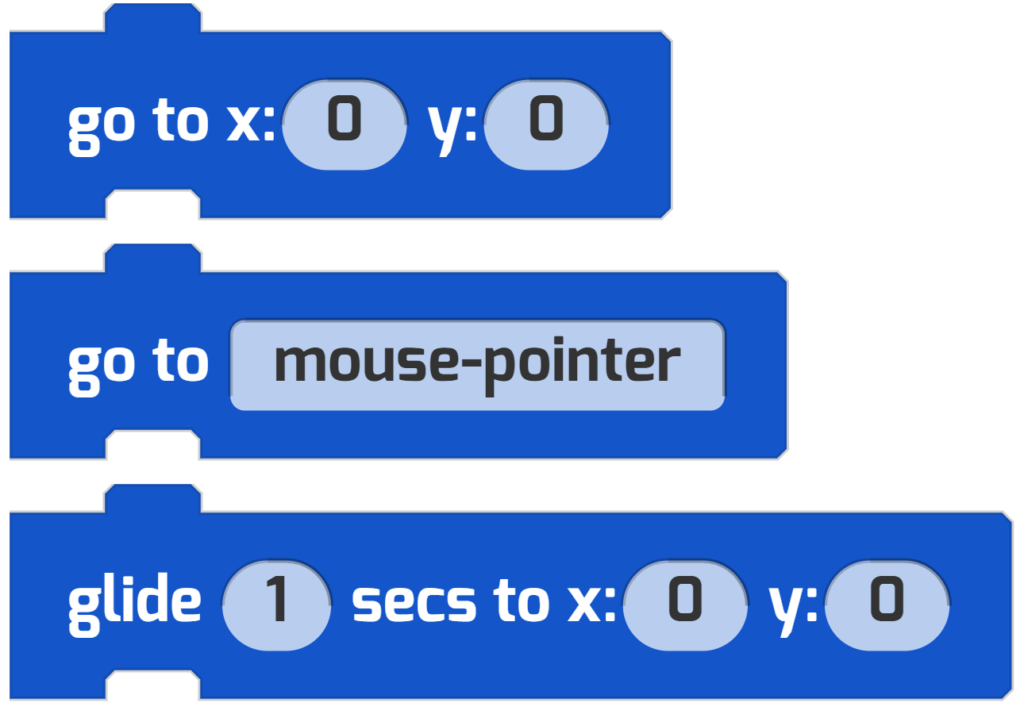
Now try connecting the go to x 0 y 0 block and fill in some interesting values to see what happens! Try to get used to connecting and disconnecting blocks.
Try It Out!
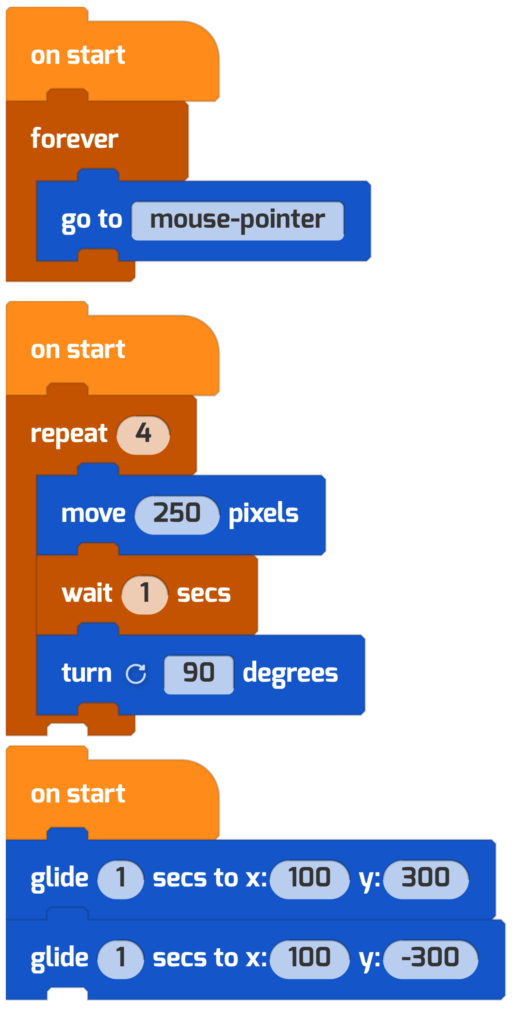
Write these programs for your actor and see how they work—one at a time or add new actors and give them one movement program each!
Watch how the actors move on the stage when you press Play. You made them move with code!
Save Your Work!
Change the name of your project from “Untitled” to a name of your choice in the upper left hand of the workshop. Then click Save.

Now, whenever you login to Tynker, you’ll be able to see and update your project!
More Activities!
Looking for more coding activities? Check out our Course Catalog.
And read the rest of our free tutorials in the Tynker Toolbox series:
- Tynker Workshop Basics — Learn about coordinates and start coding with Tynker.
- The Animation Tool — Learn about frame-based animation and other animation tips.
- The Character Creator — Take control of custom rigs using the Animation blocks.
- Text Tricks — Work with speech bubbles and more. Tell your own stories, put on a play, or make a computer write poetry!
- The Sound Blocks — Play music with code! Add custom sound effects, too. Tynker’s brand new music tool supports MIDI and MP3.
- The Synth Blocks — Create your own sound effects and instruments! You can create crunchy dubstep drops, glitchy chiptunes, or instruments from any style of music you can imagine!
- Code Block Tricks — Get top-secret ninja tips for writing code fast in Tynker Workshop.
- The Pen Blocks — Make your actors draw as they move. Create patterns, draw geometric shapes, and more.
- The Physics Blocks — Create games or simulations with gravity, collisions, and more. Think: Angry Birds and Marble Madness.
- The Augmented Reality (AR) Blocks — Want to use video or photos in your programs? Try the AR Blocks, which let you code your own selfie!
- The Artificial Intelligence (AI) Blocks — Take your AR projects to the next level with face-, hand-, and pose-tracking. Explore what makes AI special.
- The Debugger — Learn about Tynker’s data debugger and get bug-fixing tips.
- The Tutorial Builder — Did you ever make a really cool Tynker Block project and wish you could teach the whole world exactly how you did it? Now you can!
- The Python Editor — Looking for a challenge? Ready for your next step on your coding journey? Learn Python with Tynker too, and take the plunge into text-based coding.


