Did you ever make a really cool Tynker Block project and wish you could teach the whole world exactly how you did it?
Now you can, with Tynker’s new Tutorial Builder! This new tool is perfect for teachers and anyone else who wants to write their own, original block coding tutorials.
To follow along, just log in at tynker.com.
Table of Contents
Add a Tutorial
First, open your project from My Projects. Then, at the top of the Coding Palette, you’ll find the Create Tutorial button:

Click the button, then follow the on-screen instructions. When you’re finished, you’ll see the Tutorial Builder sidebar pop-up on the left.
This sidebar is where your readers will read your tutorial — and it’s where you’ll write and edit the tutorial.
It looks like this, on the left of the Tynker Workshop:
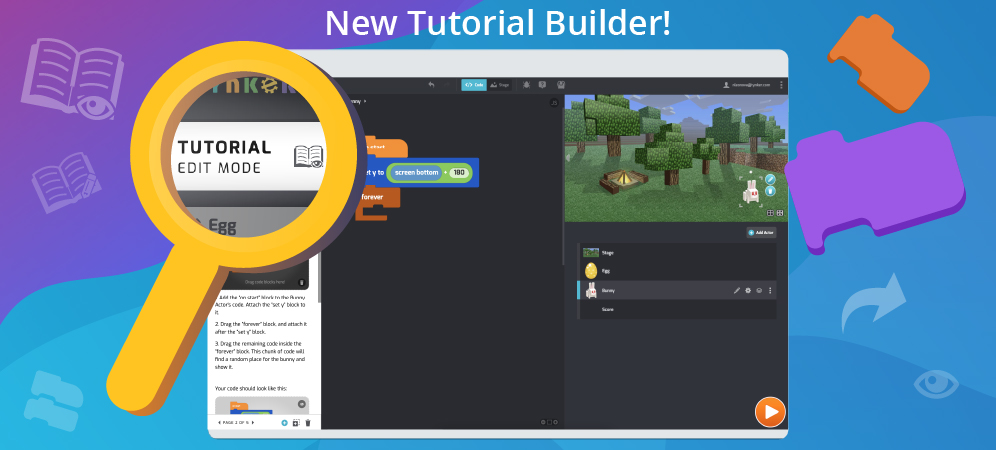
Click the Edit Tutorial button at the top of the sidebar to enter Edit Mode, where you’ll be able to add text and images.

Click on the icon again, and you’ll return to View Mode, where you’ll be able to read your tutorial just like your students will experience it. Whenever you exit Edit Mode, your tutorial’s text is saved.

To hide the tutorial sidebar and display the Code Palette, click the Close Tutorial button (it looks like a couple of code blocks). This will let you drag out code blocks and change your project’s code.

Return to Tutorial View by clicking the Show Tutorial button (it looks like a book):

Practice playing with these controls to get the hang of it:
Editor Navigation
At the top of the Tutorial Builder, you’ll see icons to control how your tutorial looks. Using these tools, you can change text formats or add assets like diagrams, videos, and runnable Tynker projects.
Let’s take a look at each one:

Force Focus Tool. As your reader advances through the tutorial, you can switch their focus to different actors. That is, rather than telling the reader, “Don’t forget to switch to the Apple actor,” you can simply select the Apple actor in this dropdown, and the reader’s focus will switch automatically as they flip the pages of your tutorial. Each page of the tutorial can have its own Actor to force focus upon.
Text Formatting. Click on the Aa button, and a text-formatting tool will appear (shown below). You can select the style (Heading, Subtitle, or Normal), as well as other formatting choices like: Bold, Italics, Underline, and ⏺ Bullets. Keyboard shortcuts like CTRL-B for bold work for basic formatting too.

Insert a Block. The whole point of writing your Tutorial is to provide your reader with draggable code blocks. This button will create a block placeholder, where you can add code blocks. The placeholder looks like this:
Once the placeholder is in the Tutorial sidebar, you can drag blocks into it from the Code Area. Then these blocks will be available as “live code blocks” for your reader—that is, readers are able to drag them right into their project as they read! Cool.
HINT: Code blocks in tutorials can be set to “live” (draggable by the reader) or to “read only.” You can make a block “read only” by clicking on the arrow in the upper right corner of the placeholder. As you click, the icon will switch:

Live Code Icon (code will be draggable by the reader).

Read-Only Code Icon (code is just an image that can’t be dragged into the project).
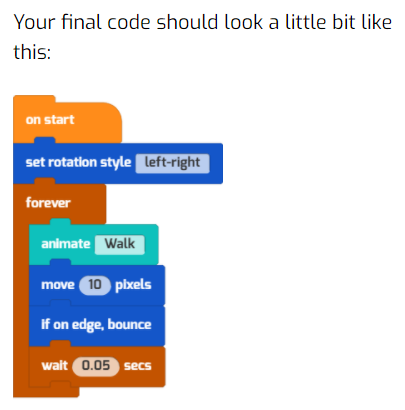
Swap between the two, then read your tutorial to get an idea of how it affects your code. For example, read-only code blocks allow you to provide “checkpoint” images of what a student’s code should look like. Or you can make all the code in your tutorial “read only” to give readers a greater challenge:
Add Audio. Don’t have time to write up your idea? Or want to add a personal touch? Add an audio recording with this button. You can add your own “voice over” too by reading your instructions aloud.
Templates. Some things come up so often in tutorials, such as “Changing the Stage’s Backgrounds” or “Adding a New Actor,” that simple insertable templates (text snippets and images) have been provided for these common scenarios.
Embed Media. You can also insert playable Tynker projects or embed a video in your project.
Show HTML Source (recommended for geeks only). This button reveals the raw HTML source of your tutorial. Use with caution.
Page Navigation
At the bottom of the tutorial pane, you’ll see the page navigation tools. This is how you can switch between tutorial pages as well as add and delete pages.

From the left, here’s what they do:
Page Navigation. Use the arrows to advance or go backwards through your tutorial.
Click (+) to add a new, empty page.
Try the Duplicate button to duplicate the current page.
Click Trash to delete the current page.
Tutorial Tips: Start with a Plan
You may find tutorial writing an interesting new challenge: Successful tutorials often involve planning ahead and several rounds of revision. Before you begin, consider a few questions:
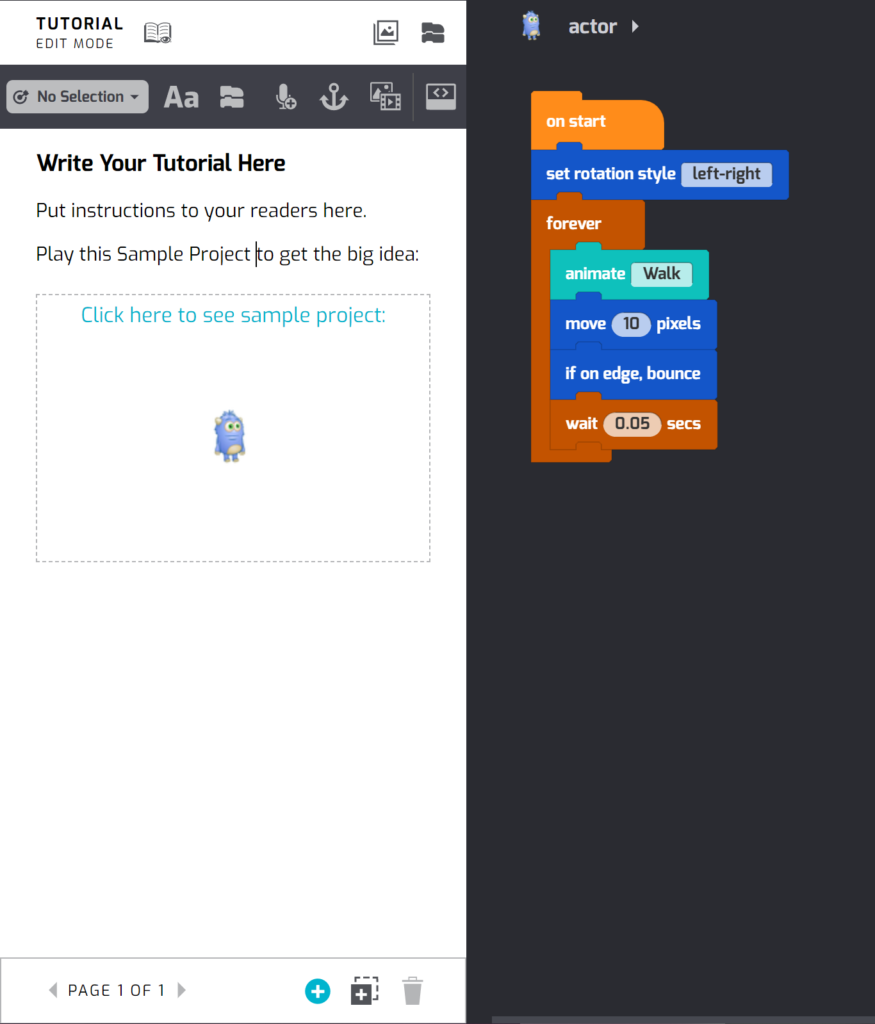
What does the complete project look like? You can use your complete project as a “Sample,” a playable demonstration project, so that your readers know what goal they’re working toward and what kind of game or story they might be creating.
How much do you want to ask the readers to do? You might have your students start with a mostly empty project, or you could just have them add a single feature, like a scoreboard or user controls to an existing game or story.
How open-ended is the project? Do you want your students to recreate your project step-by-step, or is there room for them to create something different?
Here’s one way to organize your tutorial writing process:
- Create your complete project, add any final bug fixes or polish, and Save it.
- Open your completed project from My Projects, then click the Create Tutorial button and choose “Create a tutorial based on this project.”
- If you select this option, your original, complete Tynker project will be unchanged and remain available as a separate Tynker project from the newly created tutorial.
- Write the tutorial using the copied project as the starting point. Your finished project will automatically be added to the first page of your tutorial as the Sample Project.
- Finally, remove any code or actors you want to ask the reader to complete independently, creating the “starter project” you want students to work from.
You may also wish to save a backup version of your project before beginning writing a tutorial. It’s a good idea to save a few different versions, incrementally, as you work on anything, so you can roll back to safe versions.
In other words, you can choose Save As from the File menu to save a new version, then give your project a new name and it will appear as a new project in My Projects.
More Cool Tynker Stuff
Make a cool tutorial? Share it with us and we’ll promote it in the next round of Tynker Toolbox. Looking for more coding activities? Check out our Course Catalog.
And read the rest of our free tutorials in the Tynker Toolbox series:
- Tynker Workshop Basics — Learn about coordinates and start coding with Tynker.
- The Animation Tool — Learn about frame-based animation and other animation tips.
- The Character Creator — Take control of custom rigs using the Animation blocks.
- Text Tricks — Work with speech bubbles and more. Tell your own stories, put on a play, or make a computer write poetry!
- The Sound Blocks — Play music with code! Add custom sound effects, too. Tynker’s brand new music tool supports MIDI and MP3.
- The Synth Blocks — Create your own sound effects and instruments! You can create crunchy dubstep drops, glitchy chiptunes, or instruments from any style of music you can imagine!
- Code Block Tricks — Get top-secret ninja tips for writing code fast in Tynker Workshop.
- The Pen Blocks — Make your actors draw as they move. Create patterns, draw geometric shapes, and more.
- The Physics Blocks — Create games or simulations with gravity, collisions, and more. Think: Angry Birds and Marble Madness.
- The Augmented Reality (AR) Blocks — Want to use video or photos in your programs? Try the AR Blocks, which let you code your own selfie!
- The Artificial Intelligence (AI) Blocks — Take your AR projects to the next level with face-, hand-, and pose-tracking. Explore what makes AI special.
- The Debugger — Learn about Tynker’s data debugger and get bug-fixing tips.
- The Python Editor — Looking for a challenge? Ready for your next step on your coding journey? Learn Python with Tynker too, and take the plunge into text-based coding.


