
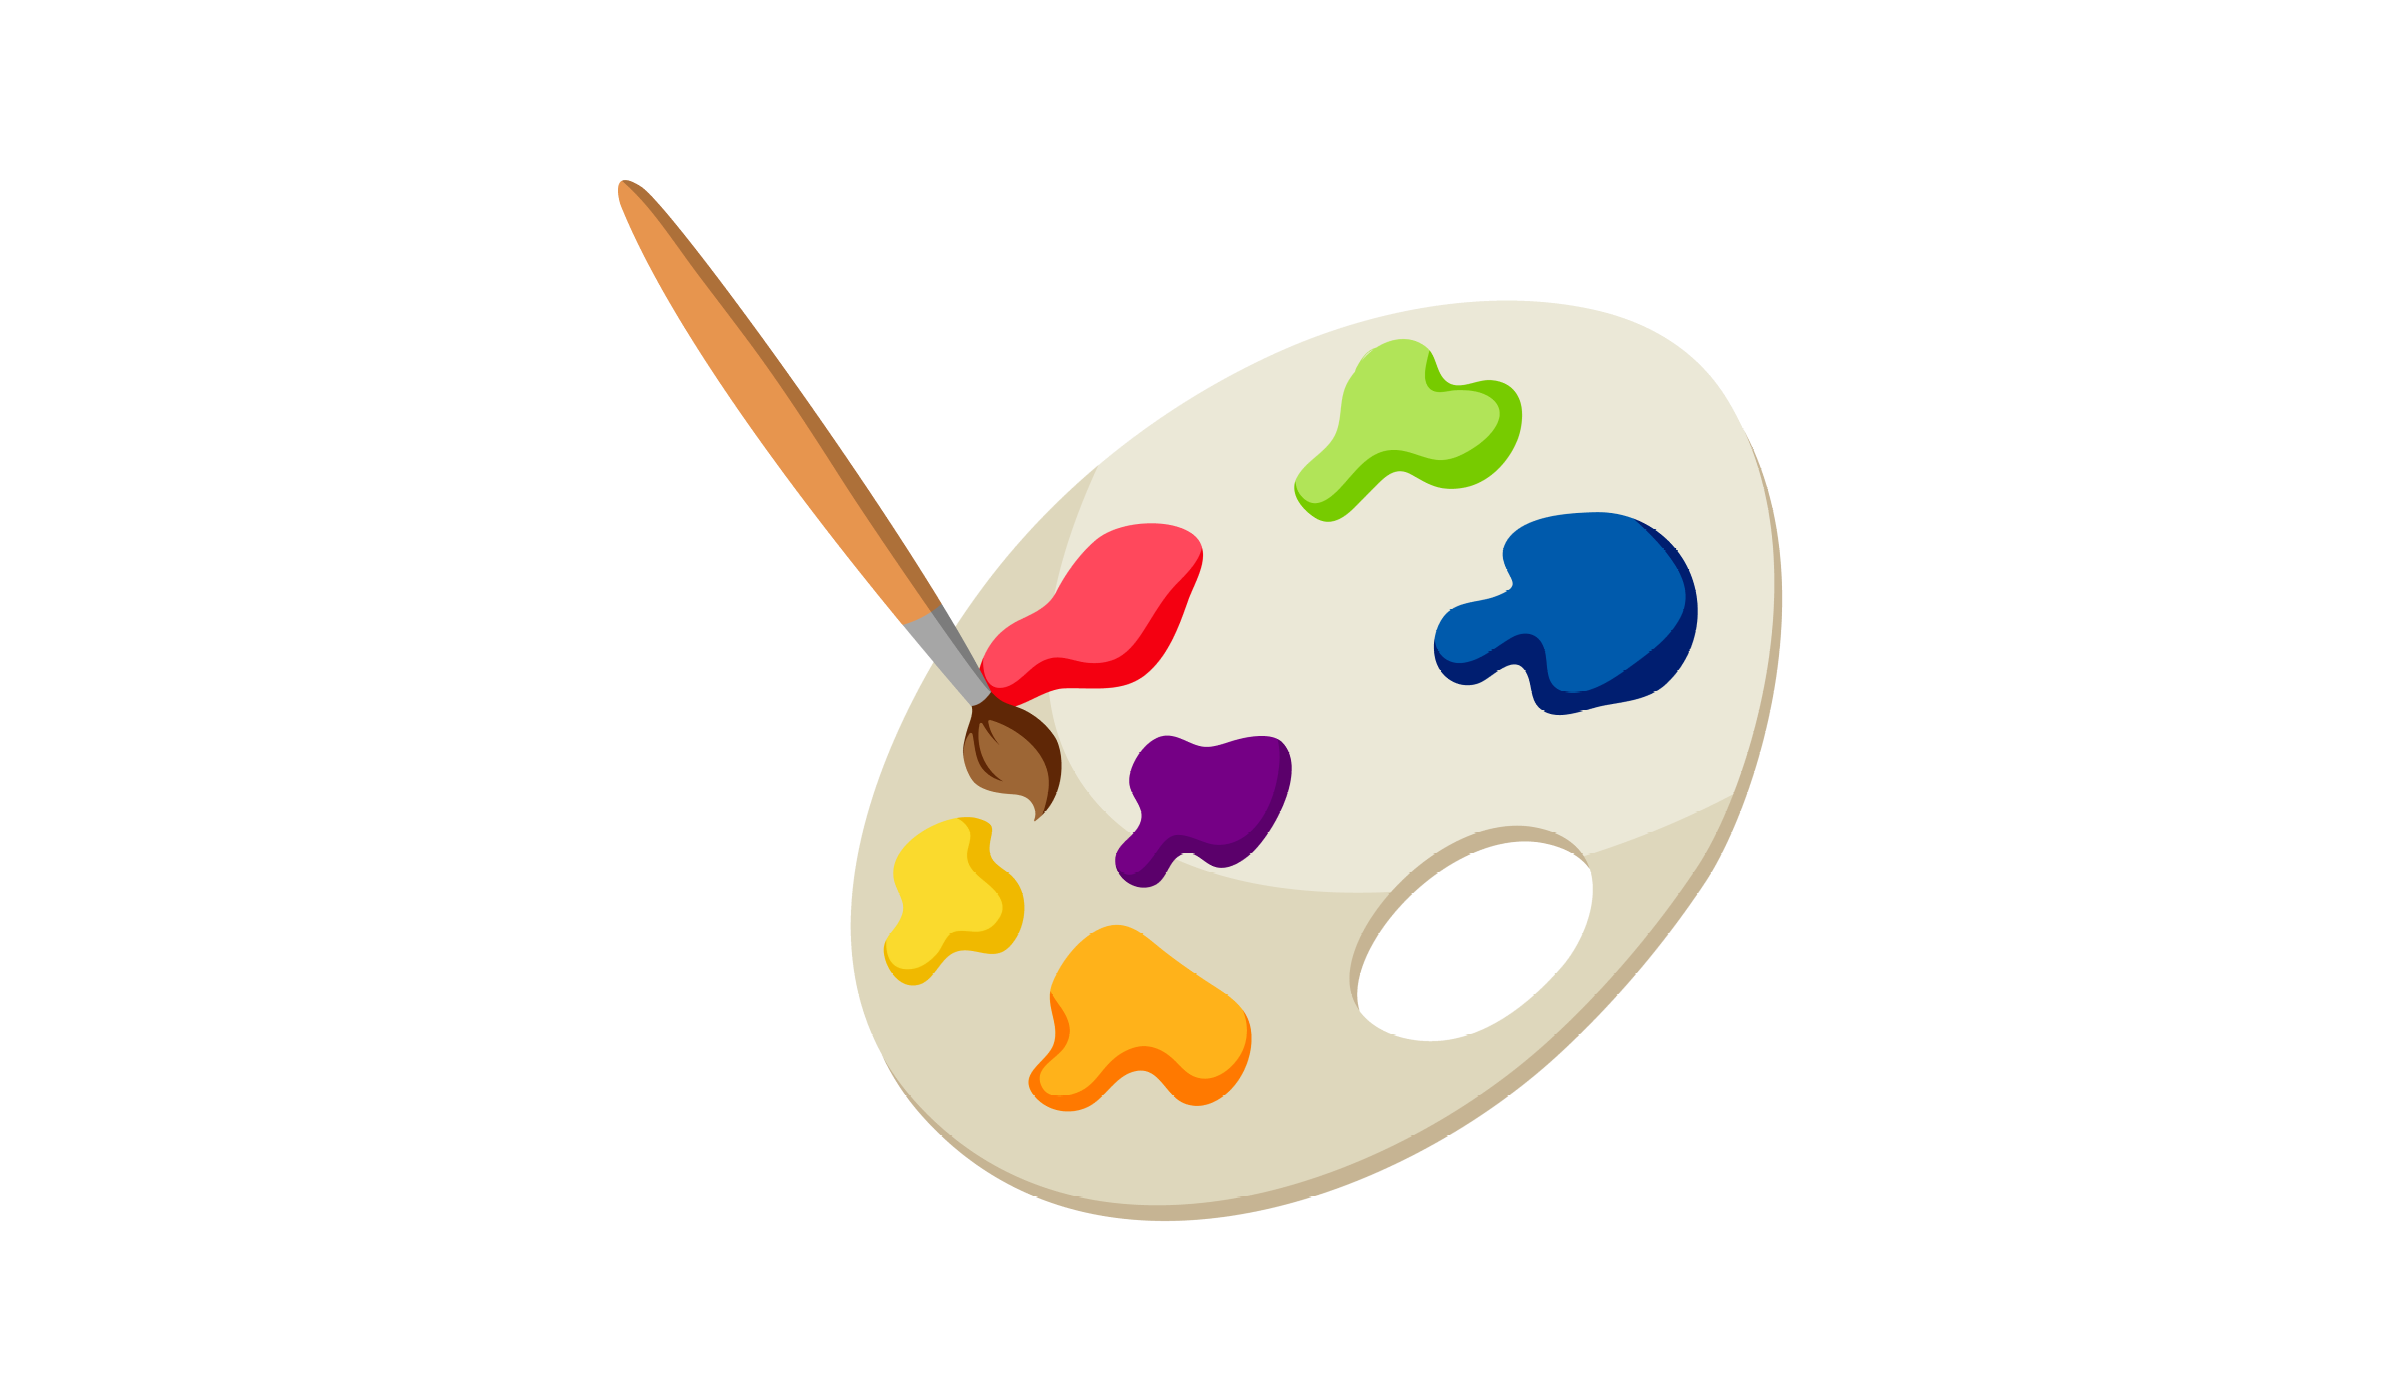
Do you love creating your own original artwork in Tynker? We have a surprise for you! We’ve added Vector support to Tynker’s Drawing Tool! It makes all kinds of amazing artistic applications possible.
Just take a look at some of the cool characters that Tynker coders created for the Winter Code Jam!
Table of Contents
Why Vector?
The new-and-improved Vector Drawing Tool lets you draw cartoony shapes and precise lines. Here are some of the other benefits you’ll see if you give the Vector Drawing Tool a try:
- Your artwork scales up and down, without losing quality
- Animate with ease — squish, rotate, and squeeze objects to create animations fast
- Work with layers to control your artwork precisely — group objects together and much more
- No more “jaggy lines”

How To Use Tynker’s Vector Editor
Create a new project on Tynker or open your favorite existing Project. Then add a new actor, by going to Add Actor > Drawing Tool. You’ll see something like this appear.
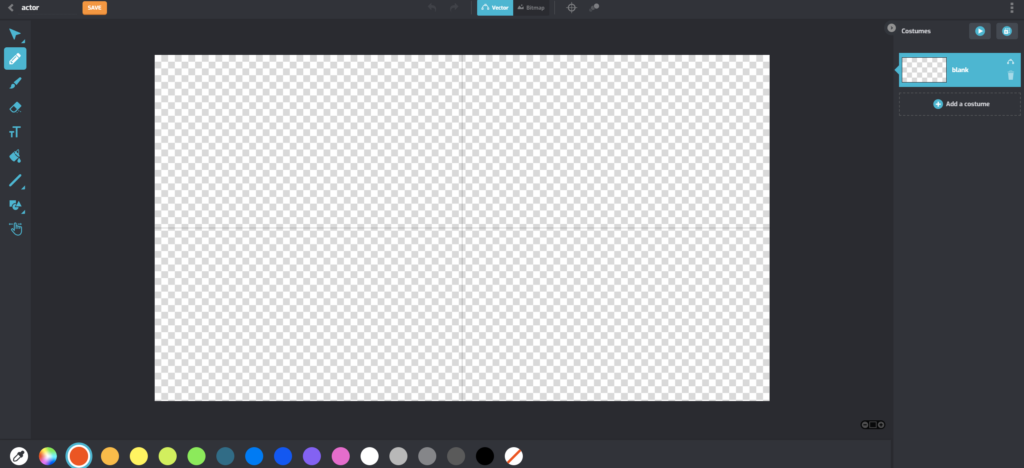
You’ll see tools on the left. Click to select a tool, then notice how the tool’s Options appear at the bottom of the screen. In this view, the Pencil tool is selected (at left), and you can see coloring options at the bottom.
Here’s what each tool does, from top to bottom:

Selection. Anything drawn on the stage can be selected. You can move the object, rearrange its layer order, flip it, and much more using the tools at the bottom! Notice the color controls. The number indicates your current outline width, which you can think of as “how wide” lines are drawn. Experiment to get the hang of these.

Here’s a quick demonstration of using the Selection tool to adjust a shape’s Fill and Outline.
BTW. Inside of the Selection Tool, you’ll find an advanced way to animate:

Point Manipulation. This is one trick that makes vector artwork special. You can customize the curves and angles of any object. See the section called Points and Handles below for a complete walkthrough. Be patient as you get the hang of things: Working with vector art can take time to learn.

Pencil. Draw freehand using the Pencil tool. This tool is best for creating lines and borders in your drawings. Choose your color using options at the bottom.

Brush. Draw freehand using the Brush tool. Instead of creating single lines, you’ll be able to draw complex shapes as well.

Eraser. Remove drawn objects from the page. (You can also Select, then Delete objects to remove them too.)

Text. Add labels or draw text of any sort. Choose your font and size after selecting this tool.

Paint Bucket. Fill shapes in your drawings, fast, using this tool. Tip: Not working as you expected? The Fill tool works on objects that are already drawn, like paths or shapes. Try drawing with the Pen or use the Shapes tool first.

Draw Shape Tool. Use this tool to draw line segments or enclosed shapes.

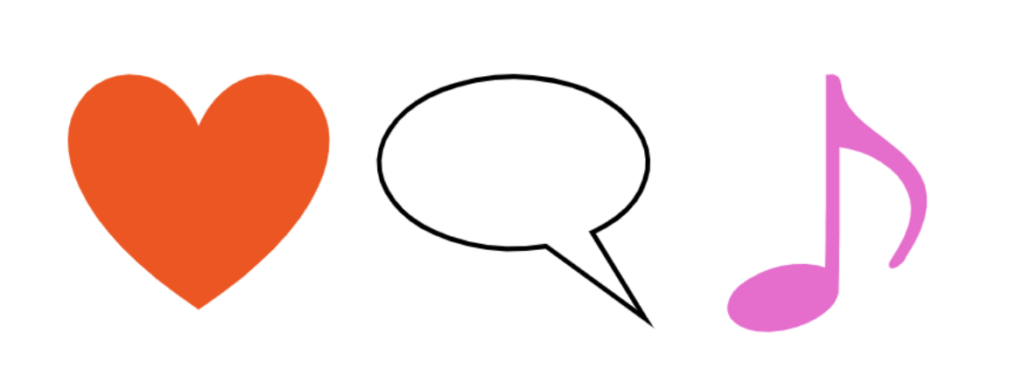
Shapes Library. Icons, shapes, and clipart that you can use in your projects! Find icons, speech bubbles, music notes, and stickers of every kind.

Move Canvas. Click and drag to pan around your canvas.
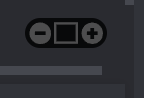
Zoom Controls. Notice how Zooming tools are in the lower right, too. The (+) button zooms in and the (-) button zooms out. Click the square to choose a Zoom Level.
Community Showcase: Create a Winter Scene
Take a closer look at some amazing animations created for Tynker’s Winter Code Jam.
An animated greeting card by Tynker user Panther!
An impressive animation sequence from Tynker user Invincible Soda! Go to the gallery below to watch their complete animation.
The art team at Tynker was impressed by the original animations of user Jeffery_Human! An adorable animation that was created with the utmost care and precision!
Need a laugh? Try “Smores Gone Wrong” from Tynker user Dragon Catcher.
Browse all the totally amazing kid-created Tynker projects here! All entrants should be proud of the cool creations you’ve made. Thank you for sharing your creativity.
And don’t forget, you can Remix any Tynker Community project, so you can see exactly how they work. Read on to see how you can achieve these cool animation effects on your own!
Create Animations
You can use Costumes to animate actors. Notice a list of all the costumes for an Actor on the right (Add Actor > Drawing Tool). This area has a bunch of handy features for previewing, duplicating, and controlling animations, whether you’re working with Vectors or Bitmap.
Let’s take a look:
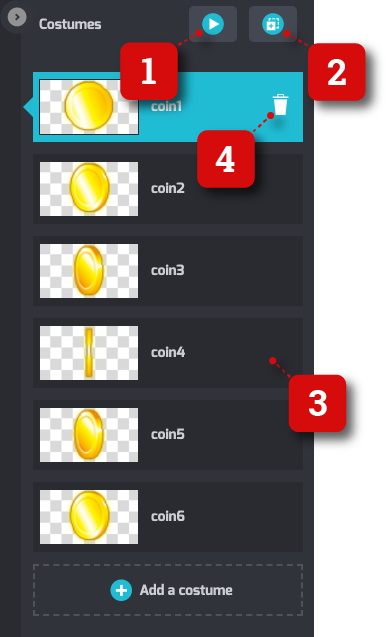
1. Preview Animation
Plays a video preview of your costumes in sequence.
2. Copy Costume
This creates a duplicate of the current costume. You can edit costumes to quickly create frames of an animation.
3. Click and Drag
Move costumes up-and-down to reorder the sequence of your costumes (frames).
4. Trash
Discard a costume (frame).
TIP: Try rotating or moving shapes to create frames of your animation quickly!
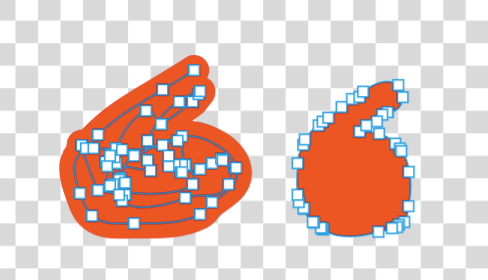
Points and Handles
Here’s a quick crash course in Bezier curves and how they work in applications like Tynker’s Drawing Tool.
Consider the line below. The points of the line are the white squares. Notice how the point in the lower right is currently selected. The two blue circles are that point’s handles. Each point along this line has handles just like this one, that can be clicked and dragged to adjust the curve.

You can move or rearrange points — and add or delete points, too, to any existing line or shape. The best way to get familiar with these ideas is practice. Try drawing freehand with your mouse, then adjust the curves afterwards. Here’s how:
- Draw a line or shape with the Pencil tool — don’t forget you can Undo if you don’t like your first try.
- Then choose the Point Manipulation tool (it’s inside the Selection tool) — notice how you can now see points on the line you drew.
- Click an individual point, and handles for that point appear. Try moving the point.
- Click and drag a handle to change the curve! Don’t forget, you can Undo this action too.
- Try deleting a few points, if your line isn’t so smooth — try to make a smooth curve. Click Delete 🗑️ at the bottom.
- Try adding points, too. Click on an existing path in your drawing, and you’ll see a new point and handles appear.
Digital Tracing Paper: The Onion Skin Tool
Drawing your own animations by hand? You can use the Onion Skin tool to show how nearby frames of animation look. This tool is like digital tracing paper!
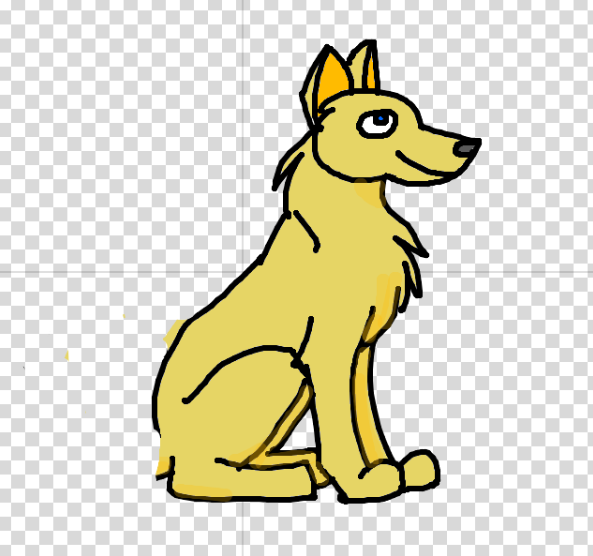
Follow along to see how it works. To draw a new actor yourself, go to Add Actor > Drawing Tool. Then let’s suppose you’ve already drawn a single frame, like this dog, that you’re happy about and ready to start animating.
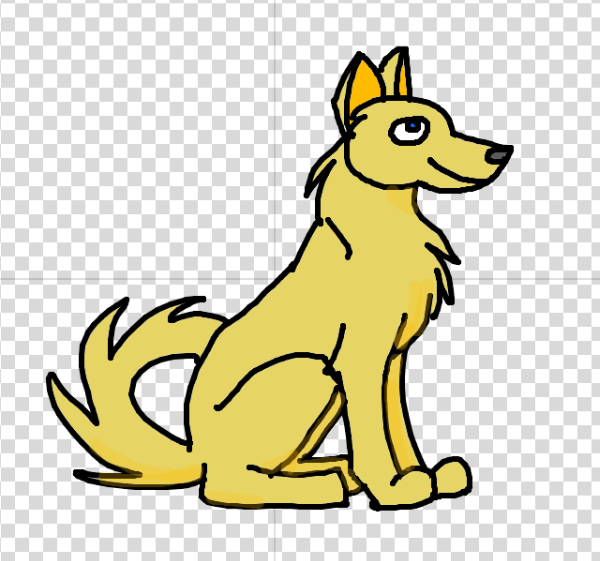
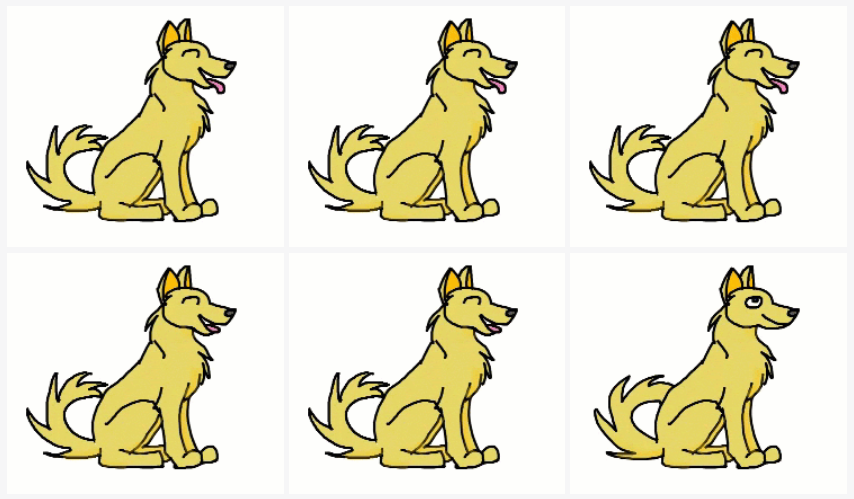
Let’s add a few frames of animation—so that this dog wags his tail.

First, copy the starting costume using the Copy Costume button. Then switch to your new costume, erase the parts you want to change—for us, that’s the dog’s tail.

Then click the Onion Skin button: Just like real-life tracing paper, this shows a translucent overlay of nearby frames, so you can use it as guidelines for your next frame of animation.
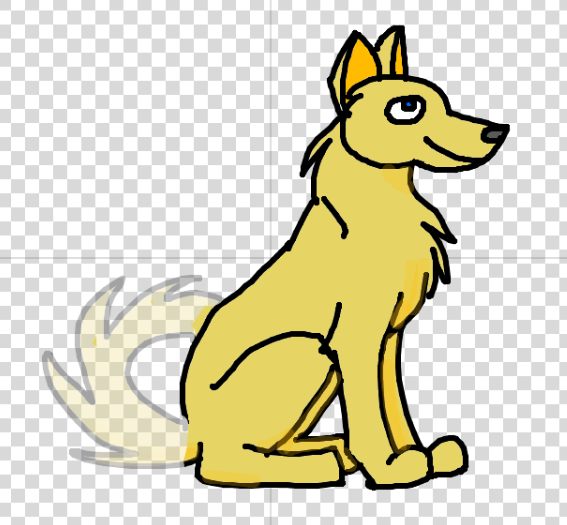
Draw the tail of the dog in a slightly different spot for each successive frame, using the Onion Skin, Copy Costume, and Animation Preview tools, as you work. You can also squeeze, squish, or rotate objects using the Point Manipulation tool. You could even create simple animations by changing fills and outline widths!

Import SVGs
You’ll also see all-new file support for importing SVGs, a file format called Scalable Vector Graphics. This means you can create Tynker-compatible artwork in vector-drawing tools like Inkscape (inkscape.org), Inkpad (for iPad users), Adobe Illustrator (adobe.com), and dozens of similar applications.
You can import SVG images using Add Actor > Upload Image — or import a costume within the Drawing Tool using the ⋮ menu in the upper right.
BTW. The original drawing mode for Tynker is called Bitmap mode, which is a kind of digital artwork where each individual pixel’s color is specified, precisely. Prefer it? No problem. You can revert to bitmap mode at any time. You can upload bitmap files as well: PNG and JPG files are already supported by Tynker.
The Pen Blocks
Want to explore a totally different way of making animations and artwork with Tynker? Try exploring the Pen Blocks, which makes actors draw as they move. Create patterns, draw geometric shapes, and more.
More Free Stuff!
Want more? Read the rest of our free tutorials in the Tynker Toolbox series:
- Tynker Workshop Basics — Learn about coordinates and start coding with Tynker.
- The Animation Tool — Learn about frame-based animation and other animation tips.
- The Character Creator — Take control of custom rigs using the Animation blocks.
- Text Tricks — Work with speech bubbles and more. Tell your own stories, put on a play, or make a computer write poetry!
- The Sound Blocks — Play music with code! Add custom sound effects, too. Tynker’s music tool supports MIDI and MP3.
- The Synth Blocks — Create your own sound effects and instruments! You can create crunchy dubstep drops, glitchy chiptunes, or instruments from any style of music you can imagine!
- Code Block Tricks — Get top-secret ninja tips for writing code fast in Tynker Workshop.
- The Physics Blocks — Create games or simulations with gravity, collisions, and more. Think: Angry Birds and Marble Madness.
- The Augmented Reality Blocks — Want to use video or photos in your programs? Try the AR Blocks, which let you code your own selfie!
- The AI Blocks — The AI blocks are three extensions that make learning about artificial intelligence fun and exciting.
- The Debugger — Learn about Tynker’s data debugger and get bug-fixing tips.
- The Tutorial Builder — Did you ever make a really cool Tynker Block project and wish you could teach the whole world exactly how you did it? Now you can!
- The Python Editor — Looking for a challenge? Ready for your next step on your coding journey? Learn Python with Tynker too, and take the plunge into text-based coding.

